
Porcini seasoned pan roasted loin of venison
We are enormously fortunate in having a good friend whose family has access to venison but doesn’t like it! We therefore help out when we can! This week we were given a piece of venison – I suspect from a roe deer. It was a very strange looking piece of meat which I wished I had photographed. It looked like a very lean meat wrapped in a number of layers of belly. A little rummaging suggested it may be loin (still with its silver skin intact.) This was indeed wrapped in what I think must have been the whole belly. Now there are a few problems here. Firstly the belly would benefit from a long slow cook. The loin in contrast really needs to be served pink. On top of that before cooking the loin the silver skin needs to be removed. If it is not removed then it will contract when cooked and leave a very chewy piece of meat. While it would have probably been possible to do the whole piece as a slow braise/roast it really wouldn’t have done any of it justice.
There was only one thing for it – the filleting knife was made ready. The 2 loin pieces , what Americans refer to as ‘backstop’ were teased away from the breast meat. This resulted in 2 loins each with a substantial silver skin attached.  This is relatively simple to remove and makes such a difference. Slide the filleting knife between the silverskin and the muscle – and then remove the silver skin in exactly the same way as you would fish skin from a fillet of fish. Just keep the blade close to the cutting board. This gave 2 lovely loin joints which just needed a little neatening to finish them. There was then around 500g of belly. The simplest thing to have done would have been to mince it and use it for sausages or burgers. This time however we chose to remove some of the more obvious connective tissues and cut it into chunks to make a simple venison ragù (more later).
Each loin yielded 3 x 150g pieces. So if cooking 2 portions remove a third and save for later. Cooking a single 300g piece is easier to handle in the pan and reduces the waste as the very ends are discarded (chef’s perks) for serving. It can be worth rolling the loin in clingfilm to make a large sausage shape as this gives a nice even shape for cooking and serving. This can be kept in the fridge until needed
 We had found some porcini mushrooms in the autumn and had dried these at home. For us porcini are a rare find on a woodland walk so we had dried and preserved every last bit of them!
  We had kept the ‘neatening trimmings’ that most people discard separate. So we took around 1tbsp of this and ground it into a powder with a pestle and morter. We added the salt we would use for seasoning the loin to the porcini powder. When ready to cook we removed the loin from the fridge. (We tend not to leave it to come to room temperature as we are trying to delay the heating of the core for long enough to colour the outside of the meat). The loin was dusted with the porcini salt mix and rolled until completely covered (the very ends were ignored as these would not be served).
The seasoned venison was then seared in one of our Tefal Ingenio pans heated directly. The trick here is to get the pan hot then add a little oil to moderate the temperature. Once the venison is put in the pan it needs to be left on each side long enough to colour.  At which point it needs to be moved around in the pan so that an even browning occurs on all sides. And we are trying to do this without the heat penetrating too far into the meat. When the venison was well coloured (core temperature was less than 40C) we set the BGE back to indirect cooking adding a cold platesetter and closed off the vents. The venison was placed back into the BGE allowing the indirect heat to bring the core temperature up to around 52C. This only took a few minutes. The venison was then rested whilst the vegetables were finished.
The vegetables were plated and the very ends of the venison loin were removed (chef’s perks) and the 300g loin cut into 4 pieces (2 large and 2 smaller).

Removing the very ends allowed the loin to be served vertically. This shows the contrast between the core, cooked medium and pink, and the well coloured exterior surfaces. These were popped into the convenient spaces left for them on the plate. On this occasion we served with charred sticky fennel based on our slow roasted caramelised fennel recipe, sautéed leeks and chard, and pan roasted parsnip.
Finally, we served with a little shallot and redcurrant sauce enriched with the venison cooking juices. Whatever vegetables you chose to serve the venison with…………
…………….. this is a lovely way to cook this beautiful loin!
Porcini seasoned pan roasted loin of venison
A 300g piece of venison loin, seasoned with salted porcini powder and pan roasted
Ingredients
- 300g of prepared venison loin
- 1tbsp porcini mushroom powder
- Salt
- Olive Oil
- (The gill area of the porcini makes an excellent powder if preparing your own porcini save the gill area for this. Dried porcini can also be blitzed in a spice grinder)
Directions
- Step 1 If the silver skin has not been removed from the loin already then remove this. It is relatively simple to remove. Slide a filleting knife between the silver skin and the muscle and remove in the same way as you would remove fish skin from fish.
- Step 2 Wrap the loin in clingfilm and roll it into a sausage shape. Leave in the fridge until ready to use.
- Step 3 Grind the porcini to produce around 1tbs of porcini powder. Add 1tsp of salt and dust the loin with the mix on all sides
- Step 4 Heat the pan on the BGE over direct heat. Once hot add a little oil to moderate the temperature. Add the venison loin to the pan, leave long enough to colour and rotate the loin to give an even colour on all sides. When the venison is well coloured (core temperature will/should be less than 40C) remove from the heat. Add the platesetter to the BGE and close off the vents. Put the venison pan back into the BGE. Allow the indirect heat to bring the core temperature up to around 52C. This only takes a few minutes.
- Step 5 Remove the venison from the pan and rest for at least 10 minutes before serving.
- Step 6 To serve, cut off the very ends of the loins then cut into 4 pieces – 2 large and 2 smaller. Plate the pieces vertically to show the pink cores of the loin uppermost. Serve with vegetable of your choice and perhaps a simple shallot and redcurrant sauce enriched with the venison cooking juices.


 This dish works especially well with the long banana shallots peeled and divided into separate bulbs (if they will) or cut lengthways into relatively wide slices. These go together beautifully with the roughly chopped garlic cloves. You will need 8 good sized shallots and 3 garlic cloves. We were cooking on the Big Green Egg set up for a direct cook initially at around 160C. The pan was put over the heat and the oil warmed in the casserole. Once the oil was warm the mushrooms were added for a couple of minutes. They were then joined by the garlic and shallots and sautéed for 4-5 minutes until they started to take on just a little colour. They needed an occasional stir to make sure they didn’t stick.
  The casserole was brought to a slow simmer and left to cook for around 45-60 minutes. And that is it!!

 The 3 carcasses and the wing tips were used to make the sauce (rather than the prime pieces as in the original recipe).
 The shallots, garlic and lardon were sautéed until they began to take on a little colour. At this point the mushrooms were added and fried for a few minutes longer. Everything was then transferred to a separate bowl.
 The chicken carcasses were cut into smaller pieces and dusted with seasoned flour. The remaining oil was transferred to the pan and the chicken was browned.
 The pan was brought to a simmer and cooked for around 20 minutes without a lid. The liquid was separated off by passing through a colander set over a bowl. The chicken carcasses were discarded and the lardon and vegetables were kept warm. The strained liquid was returned to the pan and reduced a little.
  The pan was then removed from the heat. The cream, egg yolk and a ladle of the reduced cooking liquid was mixed together and then poured back into the pan with the stock. The pan was then gently heated without boiling and stirred constantly until the sauce thickened. This may take 15 minutes, don’t rush it! The sauce needs to thicken to the point, so that when hot it just coats the back of a spoon. All the other ingredients (except the chicken) were added back into the sauce.
  The sauce was then portioned into 3 double portions and vac-packed for later.
 At this point they should be added to the warmed sauce (temperature around 85C) and left to hold the temperature for 2-3 mins or so. My favourite way however is to sauté the chicken pieces in a cast iron or heavy pan/plancha on the Big Green Egg (

 Mushrooms followed and they were cooked for another 5 minutes before the garlic was then added and cooked through for another minute or so.
 Time to deglaze the pan, adding the wine, then cooking off the alcohol and reducing the volume a little. 200ml of concentrated chicken stock was then added followed by a handful of peas (and on this occasion some finely chopped kale). This was cooked for 2-3 minutes before taking the pan off the heat.
 Once off the heat we stired in the creme fraiche and the parmesan and kept the pan warm whilst cooking the pasta. When the pasta was almost ready we put the sauce back on a gentle heat and added the pasta to the sauce with a little of the pasta water and completed the last minute of the pasta cooking as we tossed it in the sauce.


 The Pheasant breasts were cooked in a separate pan in a mixture of butter and olive oil and a stalk of rosemary until they took on a good colour. Their core temperature at this point was around 56-58C. The air vents were closed on the EGG and the remaining cooking was done with the residual heat.
  Pheasant breasts have a tendency to be a little dry even when cooked on the BGE if cooked at too high a temperature. Because of this we always aim to serve them a little pink. The breasts were sat on the finished cream sauce and the 2 were cooked together in the BGE for 5 minutes or so till their core temperature approached 63-64C (American sites tend to suggest a finished temperature for any fowl as 74C but these have been at or above 60C for more than 12 minutes and so we are very comfortable with them being lower –
  The vegetables were sautéed in a separate Tefal pan. They were started off first in a separate pan and taken to the point when nearly cooked. The pan was set to one side and kept warm. The sauce was then made, up to the point of adding the Creme Fraiche and the parmesan. This was also put to one side and kept warm whilst the pheasant breasts were sautéed in a 3rd pan. The cream and the parmesan was stirred through the sauce which was gently warmed and the pheasant breasts were put on top of the sauce. The combination was cooked on the MiniMax for a few minutes. This was set to one side, letting the pheasant rest whilst the vegetables were put back on the heat to finish off.

 This recipe started out as one of the many on their site
  As the food processor had already been used we also blitzed the onions and then cooked in the same pan as we had the mushrooms. After a minute or so the chopped garlic was added. We have also come to add the red pepper (which we use instead of the chilli in the original recipe) at this stage. This was softened with the onions. (We have also done them separately and added them back in when the mushrooms were added back – but this is just easier).
 The onions were cooked until translucent at which point the spice mix was then stirred through and cooked for another minute or so.
 The onion, garlic, pepper and spice mix was transferred to a Dutch oven together with the 2 tins of beans. This was then put into the EGG and allowed to warm through. Once warmed, the tomato puree, tinned tomatoes, tamari, vinegar and wine were all added to the pot and gently mixed together. The whole dish was brought to a very gentle simmer without the lid to cook off the alcohol and allow the liquids to reduce a little.
 Finally, the mushrooms, (the sautéed peppers if you choose to cook them separately), chocolate and maple syrup were added and stirred through the dish. As you will see from the picture we had slightly misjudged the volume of the ingredients. The pan was very full to say the least. Normally we would have cooked this for around 90 minutes or so at around 150-160C. Because the pan was so full we cooked at around 110C instead. This proved to be a great decision!
 At 110C we ended up with a very slow cook taking around 5hrs. During this time the volume reduced, though only a little, and the colour deepened. More importantly the taste took on a really complex richness, more than we have had before. It will be ‘low and slow’ for this dish from now on!


 The chicken drumsticks were therefore put into the second pan with the chicken breast, skin side down, and the cooking continued. We did this as a little challenge as clearly we could have done this more easily on the large BGE. Using the large BGE we would have had plenty of room for both pans at once. Doing this in the MiniMax means it is necessary to ‘swap over’ the 2 pans. This is why we were cooking directly, unlike on the previous occasion when we cooked the
 Once at temperature the chicken was wrapped in foil and covered with a clean tea towel to rest. The potatoes had some fresh rosemary and sea salt sprinkled over the top and were finished off on the EGG.


 I have to say I normally just use the wings to make stock (sorry all you BBQ wing lovers!). But in the spirit of making our food go further we decided to bone out the first section of the wing and then stuff the space with some chopped mushrooms and a little chorizo that we had in the fridge. These bulging pockets were closed off with a couple of cocktail sticks.
 Probably around 70% of the cooking should be done with the skin in contact with the pan. Partly through the cooking of the breast, the excess mushrooms and chorizo that we weren’t able to pack into the wings was dropped into the pan to fry off in the rendered chicken fat. These would be sprinkled over the salad that we were intending to serve with the chicken.


 Meanwhile a little olive oil was heated in the 8 inch BGE drip pan which we had with us – really too large for the Mini BGE it was all we had that was large enough to make the dish and allow closure of the lid – just! The chopped shallots were added to the pan and softened, then the sliced garlic cloves were added and cooked a little before the tomatoes were added the halved baby tomatoes first to lightly fry off then the tinned tomatoes and red wine.
 This was then all allowed to simmer until the volume was reduced by about a third. The tomatoes were mashed until reasonably smooth, seasoned and had a little basil and sugar added then left to simmer for a further 10 mins.
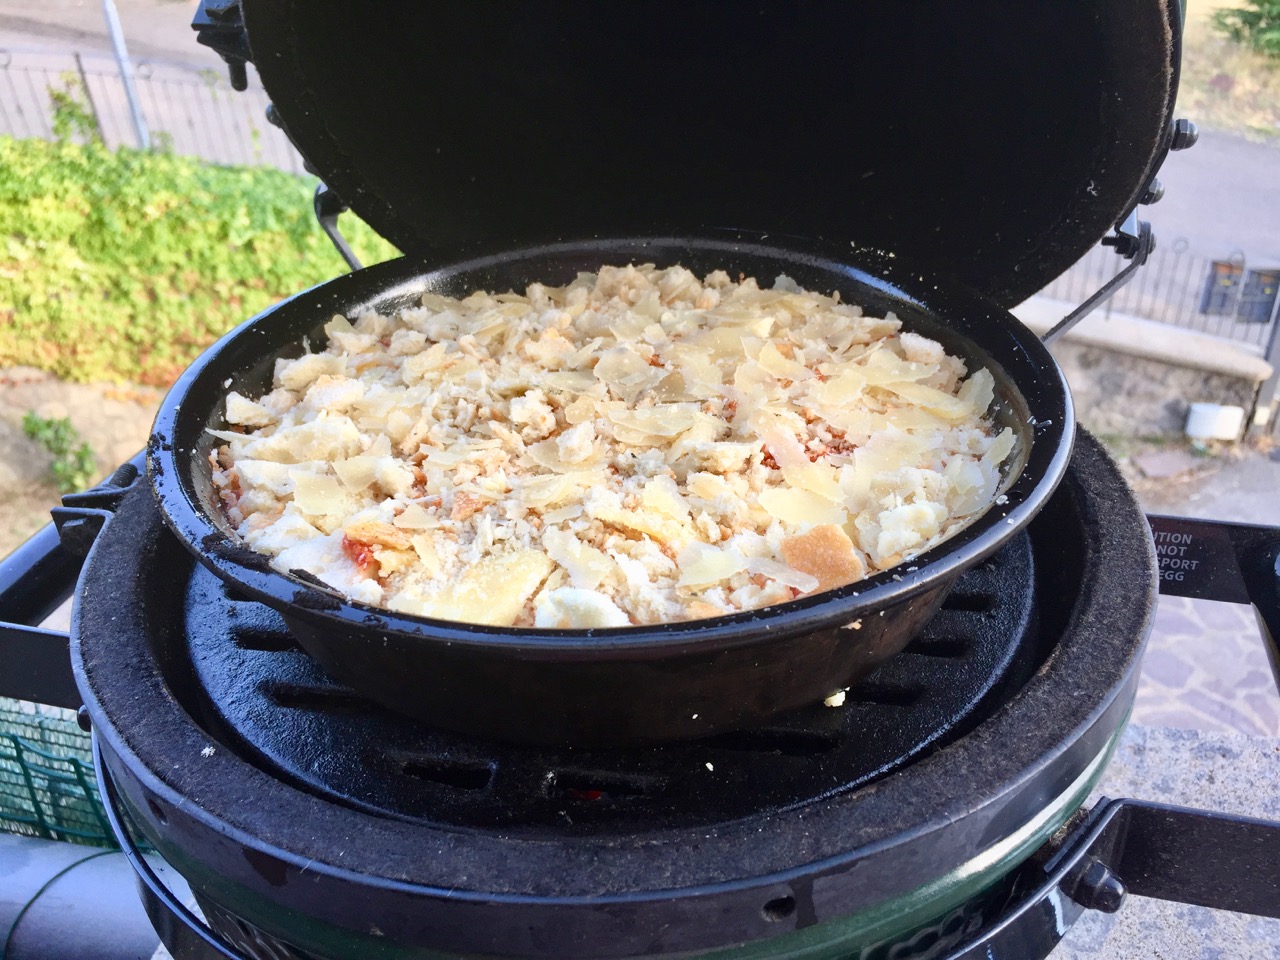
 One of the recipes I found suggested adding a layer of stale breadcrumbs at the end and then topping this with the remains of the cheese.Italian bread goes stale so quickly we had a ready supply! The breadcrumbs were tossed with a little olive oil and Parmesan and sprinkled on top. Put back in the EGG it was baked for about 40 minutes. I was hoping for a lovely bubbling crispy top but that was not to be.


 Triumphantly carrying my three porcini it was off to light the BGE. Simply set up with the cast iron grill in place and looking for a temperature around 200°C


Recent Comments