Tag: Pork

Pork cheeks braised in sherry

Pork cheeks braised in sherry

A recent raid on our freezer turned up a 1Kg pack of pig cheeks that we had completely forgotten about.  Well time to correct this omission immediately!  I really think that pig cheeks are an overlooked resource so often just turned into pork mince.  They are also often difficult to get hold of, even from small artisan butchers – simply as each pig only has two!  Wanting to do something a little different with them we found an inspiring recipe from Javier De La Hormaza, the owner of Basco Fine Foods.

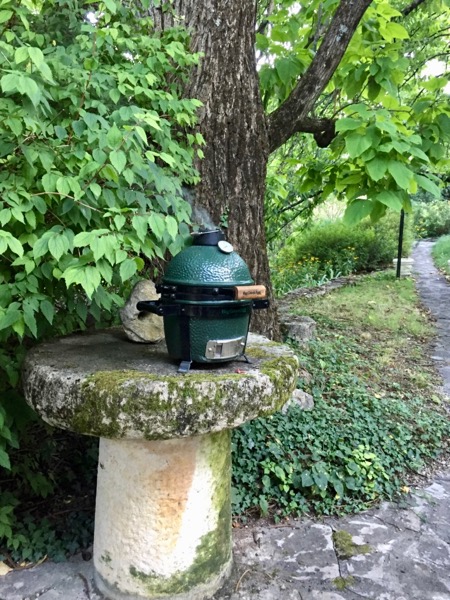
We were not going to use black Iberian pigs known as Cerdo Ibérico, which I am sure are stunning, but we did follow a very similar recipe modified slightly for cooking on the Big Green Egg.  The initial prep was quite conventional and done indoors on the hob this time before (more…)

Slow cooked crispy crackling belly pork & other friends!

Slow cooked crispy crackling belly pork & other friends!

The first thing we bought from our local butcher after the first batch of pandemic ‘lockdowns’ was a good piece of belly pork.  This is something we have never really managed to find in our supermarket deliveries as they are just too thin and lean!  True ‘low and slow’ recipes render out so much of that wonderful pork fat out of the pork.  It does leave enough thought to give fantastic taste and texture that only fat layers can provide.

For this cook we went to our ‘go to’ pork belly recipe here.  If going to cook and eat on the same day then just follow the recipe on the link.  For this cook though the cook was going to be in two phases.  The first a standard slow cook on the EGG.  Before the second phase, the finishing and production of a lovely crispy crackling we planned to portion up the pork, vacuum pack, and freeze until needed.  Finishing was done portion by portion when needed.  The steps are exactly the same but with a pause between the first and second part of the cook.  We were cooking a 1.6Kg piece which should yield 8 portions of deliciously rich pork.

Rather than give all the cooking details that are there in the link – here is a brief summary.  Our recipe has grown out of Nic William’s recipe for belly pork.  The dry skin was scored and rubbed with Maldon salt.  It was then massaged with olive oil and more salt added.  The Big Green Egg was set up for indirect cooking at 120-30C with the platesetter in the feet up position.   We used the expander system so the pork could sit on the top layer and drip quietly into a roasting pan on the second layer away from the hot platesetter. For the first hour the meat was placed with the skin up and then the pork was turned over with the skin down for the rest of the slow cook.  It would take around 6-8 hours for the pork to reach an internal temperature of  90+C.  We took the belly pork off at this stage.

Once removed from the BGE the piece was allowed to cool in the fridge overnight and was portioned and vacuums packed in the morning.  At this stage the fat in the skin has been rendered but is anything but crispy!!

To finish off the pork – defrost the number of portions required and place on a roasting tray in a domestic fan oven at around 200C.   Once the meat is back up to a suitable core temp (above 70C) add some top grill heat to your oven.  This crisps the skin very quickly – so don’t let it burn (yes we have learnt the hard way!).

There are so many ways to serve this delicious piece of meat.  On this occasion we served with baked potatoes cooked on the Big Green Egg using Nic Williams excellent recipe.   The other star in this dish was our spiced red cabbage.  The spicing and the residual balsamic recipe off sets the richness of the pork perfectly.  It works with so many other dishes too – and the recipe can be found here.

Do give these dishes a go at some point …………….

………….. they are worth coming back to!!

Below is a copy of the linked recipe for crispy pork belly

Crispy Succulent Belly Pork

March 25, 2022
: 6-8
: Straightforward

Slow cooked belly pork with crispy crackling

By:

Ingredients
  • A good slab of belly pork - if the bones are still in, leave till after the cook
  • Salt
  • Olive oil
Directions
  • Step 1 Leave the pork uncovered in a fridge for 12 hours or overnight.
  • Step 2 Score the skin well and rub in salt. Wipe the whole piece of meat with olive oil and if necessary add some more salt
  • Step 3 Set up the Big Green Egg for indirect cooking at 130C with the platesetter in the feet up position.   If using the expander system put the pork on the top grid and a roasting dish too catch the fat on the second grid – separated from the platesetter.  If you have a standard set up add some crumpled aluminium on the platesetter and put a drip tray onto this to collect the released fat. Put the grill into position over the drip pan.
  • Step 4 Place the pork skin side up for the first hour and then turn it skin side down for the rest of the cook. Once the core temperature reached 90+C remove from the EGG (and turn up the EGG to around 220C if serving immediately.
  • Step 5 Portion the pork (removing the bones which will simply slide out) and put back in the Egg to crisp the skin.
  • Step 6 If you are finishing the pork later (as here) hen crisp the skin on the pork in a domestic oven at 200C and when back up to temperature add some top heat from a grill until the skin takes on that lovely crackling appearance. This crisps the skin very quickly – so don’t let it burn
  • Step 7 rest for at least 10 mins to allow the skin to fully crisp and serve with your favourite accompaniment
Le Croque Monsieur – Mr Crunch!

Le Croque Monsieur – Mr Crunch!

Great food does not need to be complicated.  This is a simple twist on the classic ‘Croque Monsieur’. Croque Monsieur literally means ‘Mr Crunch’ – and that is what we are going to build.  The classic dish is made with smoked ham, Gruyère and a mustered infused Béchamel on country sourdough and baked in the oven.  This is a ‘shortcut’ dish – but no worse for that!

Take 2 slices of sourdough bread, and then place a couple of thin slices of a smoked ham on one of those (see here for smoked ham recipe).  Then add a couple of slices of brie which works really well on top of that.  Top off with the second slice of sourdough.   Heat some oil in a sauté pan or on a plancha and sit the bread on top. Once the base has become golden and coloured nicely flip the sandwich over and toast/sauté the other side.

Serve on a green salad………………………. it is as simple as that!!

Cooked on the hob or the BGE this is a great dish!

…………………………………………. enjoy!!


Italian Pork, Chicken and Chestnut Terrine – variations on an Autumn theme!

Italian Pork, Chicken and Chestnut Terrine – variations on an Autumn theme!

This is a very short follow up on the Autumn Pork and Chestnut Terrine blog from a few weeks ago which you can find here.  This was largely the same recipe and so we will not repeat that here.  The differences were simple and largely for visual appeal.  Instead of confining the pancetta lardons to a layer in the middle of the terrine, these were mixed into the terrine mixture.  Their place was taken by a thin layer of chicken breast.  This had been cut off some chicken we were going to eat that evening.  On top of the chicken layer we added a more substantial layer of the boiled chestnuts.

The final difference was that we bought enough pancetta slices this time to cover the whole terrine!  In the UK if I buy pancetta it is usually cut a little thicker than we find in Italy.  We therefore tend to stretch it and thin it a little by running the back of a knife along its length. There was no need to do that with the thinner pancetta.

We have also been asked what we would use instead of the Tuscan sausages when we cook this in the UK.  The answer is quite simple in that these Tuscan sausages are just minced pork (a mixture of shoulder and belly usually) with a generous dose of salt and pepper.  So in the UK minced pork bought from a butcher or pork minced at home.  The only point to watch is that Italian pork tends to be more fatty than the pork we have become used to in the UK.  It is this that gives it its special taste.   So if you are trying to recreate this don’t stint on the pork fat.  Indeed, if you get the chance (in the UK) add a little more!

As the sausages in Tuscany are already seasoned we have needed to add less salt and pepper to the overall mix. If using minced pork you will need to add more.  If in doubt – fry a little of the mix off, let it cool well and taste and adjust the seasoning as necessary.  Alter the overall amounts of the ingredients to suit the size of your terrine.  If you keep the proportions similar to this you won’t go far wrong.


For the Original recipe: – Click here


Pork and Chestnut Autumn Terrine

Pork and Chestnut Autumn Terrine

We were in holiday in Tuscany in the late summer and early autumn in 2019.  This is later in the year than we had normally gone and it certainly felt different.  Gone was the searing summer heat and in this agricultural part of Italy everything was gearing to harvest time: grapes, olives, mushrooms and chestnuts!

We were in a region with lots of chestnut trees (more…)

La Scottiglia revisited – how close had we got in recreating this dish?

La Scottiglia revisited – how close had we got in recreating this dish?

We were very lucky to be able to go back to the restaurant La Scottiglia in Pescina near Seggiano in Tuscany.  Last year, 2018, we wrote about the wonderful dish La Scottiglia that the restaurant has been named after since 1972.  This year we arrived early for a Saturday lunch and were welcomed like long lost friends by the owner.  He immediately started to talk about the recipe and blog we had written last year when we had tried to recreate La Scottiglia (see here).  He offered his congratulations for our efforts and his apologies for not writing something on the website as it would have been difficult to do so in English!

We were shown down to the terrace so we could eat outside in the dappled early autumn sunshine and were  immediately met with a Prosecco aperitif, clearly we were going to have a good lunch!

The menus were newly printed and now carried English translations which was nice.  More staggering was that on the back page was a new description of the history of the restaurant.  We were pleased that the information that we had managed to piece together from the internet seemed to be largely correct – if only it has been present before it would have saved us hours of searching (but then, where is the fun in that!!).

Jackie ordered  a Tuscan Pâté, and then ricotta filled Tortellini with truffles.  For a main course I had the wild boar – but for my starter there could only be one choice – La Scottiglia.  It was with a degree of ‘bated breath’ I tried it – had we got close with our recipe or had I deluded myself?  I needn’t have worried  (too much)!!  Our interpretation was close, though not  identical!  This was ‘softer’ with a little more liquid.  I think there was just a slight hint of chilli which ours did not have and probably a little less tomato.   Also the bread at the bottom of the dish was thinner – and had soaked up less of the glorious juices. So overall a slightly more ‘gentle’ taste than ours – but I think we can be pleased  as we have only been making it for a year rather than for more than a century!  I think we can be reasonably comfortable that ours was a suitable ‘homage’ to this most regional of dishes!

And our plans for this autumn     ……………….. to get closer still!!

Chorizo sautéed new Potatoes with Asparagus

Chorizo sautéed new Potatoes with Asparagus

There are almost as many ways of sautéing potatoes as there are varieties of potatoes, but this is one we have used with quite a lot of dishes recently.  It makes a great tapas dish or a side for other main centre pieces.  We were using Jersey Royal new potatoes which were halved and parboiled for between 8-12 minutes until they were just beginning to soften.  They were then drained and shaken a little in the pan to gently ‘roughen up’ the edges of the potatoes.

The BGE had been set up for direct cooking at around 180C.  We have been using some ‘handless” frying/sauté pans from Tefal – these work perfectly on the BGE.  They work most easily (the handle is clicked off more easily) when the cooking grid is at the level of the gasket, and so are easier on the MiniMax than the Large for instance.   The pan was brought up to temperature and the chorizo was fried in rapeseed oil added to the pan. This both cooks the chorizo and in turn spices the oil.  The chorizo needs to be removed from the pan once it has released some of its flavour but before it fully cooks through.  The par-boiled potatoes were then added and allowed to sauté.  Remember to cook with the lid down, opening just to toss the potatoes round the pan.  Once the potatoes are cooked through and colouring up beautifully the chorizo was reintroduced together with a large handful of asparagus – cut diagonally into 3 cm pieces as in the picture above. The mix was cooked for a further 2-3 minutes and then served.


…………………………really simple and can be used in so many ways!!


Spicy Charred Chicken Breast with Chorizo Potatoes

July 9, 2019
: 2-3
: 10 min
: 20 min
: 30 min
: Easy

Chorizo sautéed potatoes with asparagus

By:

Ingredients
  • New potatoes, halved
  • Chorizo 3 inch piece
  • Rapeseed oil
  • Asparagus chopped into 3cm pieces on the diagonal
Directions
  • Step 1 Halve the new potatoes and parboil then set aside.
  • Step 2 Set up the BGE for direct cooking at around 180C.  Use a handless sauté pan and bring to temperature. Fry the chorizo in rapeseed oil.  Remove the chorizo and replace with the parboiled potatoes and sauté.
  • Step 3 Add the cooked chorizo to the potatoes and asparagus as they finish being sautéd
  • Step 4 Serve immediately


African Spiced Roast leg of Pork

African Spiced Roast leg of Pork

We seem to have had a spate of ridiculously cheap pork on offer at our local supermarket recently.  We buy most of our meat from one of a couple of very fine butchers we have locally.  Nevertheless, even when you are not looking to buy a leg of pork, if it is offered to you at £2 per kg, there is a real need to go and look for a recipe.  I am always a little cautious of expecting too much from inexpensive meat and so this African inspired spiced pork recipe from my friend Julie from Meat Smoke Fire Ltd seemed a perfect way of using this leg of pork.  The spicing inspiration is African and by using a ready made Harissa mix as the basis for the marinade is very straightforward and would cover any slight blandness that you may suspect with commercial supermarket pork.  Equally, whilst this is a roasted dish, the basting of the meat with the lemon and wine stock adds an element of a ‘braise’ and would hopefully add some tenderness to the meat.

To make the marinade the herbs and spices (oregano, caraway seeds, cumin seeds, marjoram or savory, turmeric) were ground in a mortar with 1tsp of course sea salt.  This was then added to 3 crushed cloves of garlic, 2tbsp of ready made Harissa and 60ml of olive oil to make a paste.  We took the skin off the pork but left as much of the fat in place as possible.  The meat was then slashed to make 8-10 deep cuts and the paste was rubbed all over the meat and into the slits.  The meat was then covered and left to marinade at room temperature for an hour or so.

The Big Green Egg was set up for indirect cooking with platesetter in place (feet up).   A little cherry wood was also added as a final ‘spicing’ for the mix.  All that was left to prepare was to quarter 2 onions lengthways and to mix the lemon juice and white wine. These were then set to one side.

When ready to cook, the pork was placed fat side down in the roasting dish and cooked for about half an hour.  The meat was then removed from the roasting dish and the quartered onions were arranged in the centre as a trivet. The pork was turned fat side up and placed on the trivet of onions. The lemon and wine mix was then poured over the top of the meat.  The EGG was closed and left to cook for another 40-60 minutes opening to baste the meat with the cooking juices every 10 minutes or so. Once the internal temperature reached around 70C the meat was removed, wrapped in foil and left to rest for at least 20 minutes.   The cooking juices were reduced to form a pouring sauce.  The meat was generously sliced and served with cauliflower and the roasted onions.  The cauliflower was a perfect foil for the spicy pork and carried the spicing from the sauce beautifully.

I would highly recommend giving the dish a go.   The results were spicy but not too hot, and very very tender!!

…………….if you want to add a little spice to your roast pork now is your chance!

African Spiced Roast leg of Pork

June 24, 2019
: 6
: 15 min
: 1 hr 30 min
: 1 hr 45 min
: Easy

Roasted skinless leg of pork with African spices

By:

Ingredients
  • 1tsp coarse sea salt
  • 2tsp dried oregano
  • 2tsp caraway seeds
  • 1tsp cumin seeds
  • 1tsp dried marjoram
  • 1/2tsp turmeric
  • 2tbsp harissa
  • 3 crushed cloves garlic
  • 60ml olive oil
  • 1.5kg boneless pork leg roasting joint - skin removed
  • 60ml lemon juice
  • 80ml dry white wine
  • 2 large onions, peeled and quartered
Directions
  • Step 1 For the marinade: grind the oregano, caraway seeds, cumin seeds, marjoram and turmeric in a mortar with 1tsp of course sea salt.  Add this to 3 crushed cloves of garlic and 2tbsp of ready made Harissa and 60ml of olive oil to make a paste.  Slash the meat after the skin is removed to make 8-10 deep cuts. Rub the marinade paste all over the meat and into the slits.  Cover and leave to marinade at room temperature for an hour
  • Step 2 Set up the Big Green Egg for indirect cooking with platesetter in place (feet up).   Add a little cherry wood.
  • Step 3 Quarter 2 onions lengthways. Mix the lemon juice and white wine and then set these to one side.
  • Step 4 When ready to cook, place the pork fat side down in the roasting dish and cook for about half an hour.  
  • Step 5 Remove the meat from the roasting dish add the quartered onions in the centre as a trivet.  Turn the pork over and sit on the onion trivet. Pour the lemon and wine mix over the top of the meat.  Close the EGG and leave to cook for another 40-60 minutes. Baste the meat with the cooking juices every 10 minutes or so.  
  • Step 6 Remove once the internal temperature reaches 70C and wrap in foil to rest for at least 20 minutes.  
  • Step 7 Reduce the cooking juices to form a pouring sauce.  
  • Step 8 Slice the meat and serve with cauliflower and the roasted onions.  
Pork Rillettes

Pork Rillettes

I tend not to buy meat from supermarkets very often but when you see boned pork shoulder at £2 per Kg it is difficult to walk past without dropping 5Kg or so into the basket.  I have to say it wasn’t the most beautifully butchered piece of pork I have ever seen.  Nevertheless, we were going to make some rillettes and use the rest for a slow cooked Pulled Pork (see here) so it was worth a shot!  The added bonus was that I wanted to try and render my own pork fat to top the rilletes.  There was a lot of skin on this piece which would be great to render and would certainly not go to waste.

A classic pork rillettes is not a pâté, rather it is a long, slow-cooked pork dish. It is cooked in its own fat with a little stock, few herbs, garlic and seasoning. In a way it has more in common with pulled pork, but a pulled pork set in its own stock and fat. It is quite simply delicious to the point that I need to ration it – once started it is difficult to stop. Be warned!  Spread rillettes on toasted baguette or sourdough bread, sprinkle lightly with freshly cracked black pepper and salt for a light lunch or a quick starter.  Try it too with a little sweet chutney – not authentically French but a delicious combination nontheless.

The recipe is quite straightforward. Cut the pork into pieces about the size of a walnut.  Then add the finely chopped garlic, bay leaves, thyme, crushed juniper berries, cloves and the coriander as well as the Chinese 5 spice and Allspice together with a generous seasoning of salt and pepper. To this was added a couple of splashes of calvados and around 200ml of chicken stock to nearly cover the pork.  The pan was brought up to a very gentle boil and then transferred to an oven.  This can be done on the BGE where I would set the temperature to around 120C cooking indirectly, or just as readily at 120C (Fan) in a conventional oven.  I would do this in the BGE if I was cooking something else or if I wanted to add a little smoke to the spice mix.  In all honesty though it is perhaps a little easier in a conventional oven.  If doing on the BGE I would do this without the lid, but in a conventional oven with the lid in place.

After about 3 hours the meat should be sitting in a lovely liquid stock and have softened considerably.  At this stage it will easily breakup with the pressure of a fork.   To separate the liquid from the solids I would suggest putting the whole content of the pan into a sieve and gently squeeze the excess fluid from the meat and garlic residue.  Pop the liquid into the fridge to chill.

Put the meat and garlic back in the cooking pan and begin to shred the meat to the consistency you want.  I like it quite coarse with some body in the shredded meat. Some recipes suggest doing this in a food processor – personally I think this is a terrible idea and leaves you with a mousse not a rillette! Assuming the meat has been cooked for long enough it will break up with a fork very easily.  Once you have the meat broken down to the size you want, pack it loosely into ramekins.  It is packed loosely so that the reserved meat juices can be poured back into the meat.  It can then find a way of flowing round all the meat fibres.  When you take the reserved juices from the fridge a pure fat layer should have appeared on the top if you have left it for long enough.  Remove and reserve this fat layer.  Pour the meat juices into the ramekin stopping when the liquid just comes to the surface of the meat.  The ramekins were then allowed to chill further which allows some absorption of the meat juices.  The reserved fat can then be heated and gently poured over the rillette to seal it. The dishes are then left for at least 2hrs in the fridge to harden.  Left like this with the fat on the surface the rillette will keep happily in the fridge for around 10 days and the fat can be scraped to one side when serving.  If you are intending to use in the next day or so a simple cling film lid will do a similar job.  If you don’t like the idea of using pork fat to seal then an equally adequate seal can be made with melted butter.

……………………………. do give it a go!


Pork Rillette

April 24, 2019
: 12-14
: 1 hr
: 3 hr
: 4 hr
: Moderate

Slow cooked herbed and spiced pork transformed into a delicious meat delicacy

By:

Ingredients
  • Pork Shoulder or Belly 1Kg
  • Garlic 5 large cloves
  • Bay leaves 4
  • Thyme
  • 10 Juniper berries
  • 4 Cloves,
  • Coriander, quarter tsp
  • Chinese 5 spice, quarter tsp
  • Allspice, half tsp
  • Salt and pepper.
  • Calvados a large splash
  • Chicken Stock around 200ml
Directions
  • Step 1 Cut the pork into pieces about the size of a walnut.  Then add the finely chopped garlic, bay leaves, thyme, crushed juniper berries, cloves and the coriander, Chinese 5 spice and Allspice together with a generous seasoning of salt and pepper. Then add a couple of splashes of calvados and around 200ml of chicken stock to nearly cover the pork. (ideally leave to marinade overnight though this is not essential)
  • Step 2 Put the pan on the heat and bring up to a very gentle boil and then transfer to an oven.  This can be done on the BGE indirectly at a temperature of around 120C or just as readily at 120C (Fan) in a conventional oven.  If doing on the BGE I would do this without the lid, but in a conventional oven with the lid in place.
  • Step 3 After about 3 hours the meat will have softened considerably.  Separate the liquid from the solids using a sieve and gently squeeze the excess fluid from the meat and garlic residue.  Pop the liquid into the fridge to chill.  
  • Step 4 Put the meat and garlic back in the cooking pan and shred the meat to the consistency you want.  Pack the meat loosely into ramekins. Take the reserved juices from the fridge and remove the solidified fat layer. Pour the meat juices into the ramekins stopping when the liquid just comes to the surface of the meat.  Allow ramekins to chill. Gently heat the reserved fat and pour over the rillette to seal it. Leave the dishes for at least 2hrs in the fridge to harden.  The sealed rillette will keep happily in the fridge for around 10 days


When is a gammon not a gammon?!

When is a gammon not a gammon?!

The simple answer is of course once it is cooked it is then referred to as a “Ham”.  What ever we call them this is a delicious  way of eating pork and in the UK is always associated with the Christmas period – but it it too good to confine to Christmas!  There are so many different types of gammon available depending on how they have been cured and each of these produce slightly different types of ham. (more…)

Our Christmas Terrine

Our Christmas Terrine

Having finally come to the conclusion what we were going to include in the Christmas Terrine it was time to put it all together!!  The one thing we have learned this year making terrines is that (more…)

Game Terrine – getting in practice for Christmas

Game Terrine – getting in practice for Christmas

We had fun making terrines on the Big Green Egg over the summer when on holiday in Tuscany.  So now it was time to put some of that experience together as we get ready for Christmas.   (more…)

Tuscan Terrine – Two!

Tuscan Terrine – Two!

This is a very short blog (and modified recipe) about our second attempt at the Tuscan Terrine (see the first version here).

The recipe remains largely the same.  In an attempt to have a slightly drier mix, only the gin was used as a liquid addition, forgoing the red wine and orange juice, which meant we could limit the amount of the bread used for the bread crumbs.   (more…)

Tuscan Terrine – the first venture!

Tuscan Terrine – the first venture!

Making terrines is something of a lost art in the UK and we are venturing into this area quite tentatively.  I have to say most of our experience has been in the indoor kitchen and not in the BGE.  As I have found a very inexpensive small Le Creuset oval casserole, on eBay, that just fitted the mini BGE – I was going to see what opportunities it opens up when traveling with the mini BGE. – Was a terrine a possibility?

The plan was to use our standard home recipe – but clearly modified for the products around us. The basis of our standard recipe is minced pork shoulder, diced bacon (more…)

Braised pigs’ cheeks

Braised pigs’ cheeks

This is a title that will polarise people – some will rush to what is actually a lovely winter recipe, and I can already see others “screwing up their faces”!  If you like ‘pulled pork’ and you like slow cooked winter casseroles you will love this, trust me!! (more…)

Classic Pulled Pork

Classic Pulled Pork

Pulled pork is a BBQ classic with its origins in the US.  There is lots of “folklore” attached but in essence it is a very simple dish to cook.  It needs to be cooked slowly, ideally over charcoal with a little dry wood to add some smokiness.  It needs to be given plenty of time to cook (more…)

Pork Loin with Tuna and Caper Sauce – Lonza di maiale Tonnato

Pork Loin with Tuna and Caper Sauce – Lonza di maiale Tonnato

We had really enjoyed our “Vitello Tonnato” when we were in Italy and wanted to try something similar now we were in France, but on this occasion we couldn’t find any veal.  So ‘necessity being the mother of invention’ (more…)

Italian Sausages in France

Italian Sausages in France


After a lovely break in Tuscany we had driven into France, to the Rhône-Alpes to meet part of our “French family”.   (more…)

Pork 2 Ways – Tuscan style

Pork 2 Ways – Tuscan style

When is a sausage not a sausage? When it is a Salsiccia!

Tuscan sausage looks a little like a shorter and fatter British banger – it too is made primarily of pork but the flavouring is a little different, garlic, coriander and cayenne pepper rather than onion nutmeg and sage.  Both favour a little mace but the real difference is the breadcrumbs or rusk, found in a British Banger but not in the Tuscan Salsiccia.

So, tonight we were getting a little ‘cheeky’ pork two ways – one in a Tuscan sausage and one as a small pork fillet – both very inexpensive.


The plan was to serve with a little grilled fennel and a mixed green and bean salad.  The sausage was going to be simply grilled and the pork fillet similarly but with a mustard and honey coating.  And this was where the fun starts – staying in a friend’s house we had no honey in the cupboard so time for that holiday improvisation and some apricot jam!


For the pork glaze:

  • Tablespoon mustard (this one was French)
  • Half tablespoon of apricot jam
  • Salt and pepper
  • A little olive oil

The egg was brought up to a very modest grilling temperature of around 140-150°C and some oak chips were added for a little smoke flavour.

The Tuscan sausage were popped on the grill.  The pork fillet had had any ‘silver skin’ removed with a sharp knife and had been sitting in a little olive oil with salt and pepper for about an hour.  After about five mins of gentle sausage cooking the small fillet was also added to the grill turning every few minutes so that it all took on some colour

After around another six to eight minutes the fillet was browning and it was taken off the grill and brushed with the mustard and apricot glaze (definately more of a glaze than a rub!

The fennel slices were removed from the grill and as there was plenty of mustard and apricot glaze – it too got a splash before being put back on the grill.

We were going for slightly pink pork and so when the internal reached 64°C (approx. 15-20 mins total) the fillet was taken off the grill and wrapped in foil for 10 minutes (during this time the core temperature of the Egg rose another 2°degrees).

All the vents on the BGE were closed to put out the charcoal – though the sausage and the fennel were left to finish off as we wanted the temperature of the sausage to reach at least 74°C. The pork fillet was cut into 2 portions for each plate and the sausage likewise!

If you are more comfortable with your pork cooked a little more, then the older recommended temperature for pork was 74°C so just leave on the grill a few mins more!

… buon appetito!


Pork 2 Ways - Tuscan style

August 4, 2017
: 2
: 1 hr 30 min
: 30 min
: 2 hr
: Easy

Italian Sausage and Pork Fillet served with charred salad Fennel and a green and bean salad

By:

Ingredients
  • 2 Italian Sausage
  • Small Pork Fillet
  • For the glaze
  • Tablespoon mustard (this one was French)
  • half tablespoon of apricot jam
  • salt and pepper
  • a little olive oil
Directions
  • Step 1 Remove the silver skin from the pork fillet with a sharp knife and sit in a little olive oil with salt and pepper for about an hour.
  • Step 2 Mix the glaze – mustard, apricot jam, salt and pepper and a little olive oil
  • Step 3 Bring the BGE up to a temperature of around 140-150°C (direct) and add some oak chips for a little smoke flavor.
  • Step 4 Place the sausage on the grill. 
  • Step 5 After about five mins of gentle sausage cooking add the pork fillet to the grill turning every few minutes so that it takes on some colour
  • Step 6 Add the Fennel slices to the grill
  • Step 7 After around six to eight minutes remove the Pork Fillet and the fennel slices and brush with the mustard and apricot glaze and put both back on the grill.
  • Step 8 For slightly pink pork remove from the grill when the internal reaches 64°C (approx. 15-20 mins total)
  • Step 9 Wrap the fillet in foil for 10 minutes (during this time the core temperature of the fillet will rise another 2°degrees).
  • Step 10 Close all the vents on the BGE and leave the sausage and the fennel to finish (the temperature of the sausage should reach at least 74°C.
  • Step 11 Cut the pork fillet and the sausage into 2 portions for each plate
  • Step 12 (If you are more comfortable with your pork cooked a little more, then the older recommended temperature for pork was 74°C so just leave on the grill a few mins more!)