
Mediterranean Stuffed Lamb Breast – from Gordon Ramsay
Time to get my personal prejudices on the table – I have never enjoyed watching Gordon Ramsay on the television – but I really do like some of his recipes! There you are – all out in the open! This recipe is a perfect example! We have modified it very slightly to cook on the Big Green Egg. Additionally, as I really don’t think it benefits at all from the addition of chilli flakes, these have been omitted from our cook. The recipe below includes chilli as on option. We have included a link to Ramsay’s original recipe and YouTube video (1).
I really love working with these secondary cuts of meat that need to be cooked slowly and in doing so can take on such bold flavours. In addition they are often relatively inexpensive – this is a real case in point. The recipe was based round a 750g rolled lamb breast. It was picked up at our local supermarket reduced from £4.70 to £2.29!! A true bargain – though even at full price it would have been excellent value!
 The first thing to do was unroll the piece so that we could add additional flavours to the inside of the joint. The roll had been made up from 2 separate pieces, again illustrating the versatility of this cut.
 ![]()
It was laid out on a cutting board and seasoned generously with salt on both sides.  This was followed by the dried oregano, lemon zest and anchovies. The ingredients for the dish gave it a very Provençal feel. From our experience chilli is not used to any great extent in Provence and so we omitted the chilli flakes that were suggested in the original recipe.
So time to re-roll the meat. We used some small elastic poultry bands to hold it together. These work so well on small cuts of meat like this as well as on poultry! If you don’t have any to hand, then a conventional butcher’s string tie at each end and one in the middle would be fine.
 We did the first part of the cook in one of our handless Tefal pans. This could be done directly on the BGE or on a conventional hob. The pan was heated and some olive oil added. The lamb was then rolled around the pan until it took on some good colours all over. As the outer layer shrinks a little as it cooks, the inside seems to squeeze out of the middle as in the picture. Don’t worry about this as it will largely correct itself in the second part of the cook. Whilst the meat browned, the onions were cut into large chunks (as it was going to be a slow cook and we don’t want them to disappear into the cooking sauce).
  The meat was set aside, a little more oil was added, and the onion put straight into the same pan to fry with the partially crushed garlic. The capers were then popped in with the onions and cooked through, followed by a little more lemon zest. The pan was then deglazed with white wine and a good squeeze of lemon juice. The final addition was the tinned tomatoes which were gently crushed and stirred into the mix. The rolled lamb was then placed on top and we were ready to go.
If cooking indoors this needs to be covered with a lid or a foil top to prevent too much liquid loss. It can then be placed in the oven on 170C for 2 – 2.5 hours.  We were cooking in the Big Green Egg which had been set up for indirect cooking at around 140C. Cooking in the EGG this way we usually leave the dish uncovered. Very occasionally the liquid may need to be topped up a little with some water.

At this temperature I would expect to cook for 3-4 hours until the meat core temperature was between 88-93C. At this point the meat would be very tender but not quite at the stage you might have for pulled lamb. It is however perfect for slicing.
After about 3 hours – the lamb was lifted out and the sauce stirred to check on the consistency. It really didn’t need any more liquid so the lamb was popped back in and left to complete the cook.
 When the core was around 90C the meat was removed and allowed to rest prior to carving. At this point the final consistency of the sauce can be checked.
 When ready to serve, carefully remove the bands or butchers string and carve into generous slices. These can be served directly on the sauce. We also added some French beans from the garden – well it is a Provençal dish!!
We will be doing it again ……………
………………… do give it a go!!
References (1) Gordon Ramsay’s Braised Stuffed Lamb’s Breast – https://m.youtube.com/watch?v=VaWYE8dvDGk
Mediterranean stuffed lamb breast
Slow braised lamb belly flavoured with anchovies and cooked in a rich Mediterranean sauce
Ingredients
- 1 lamb breast (around 750g)
- Salt
- 1/2 tsp dried oregano
- (1/2 tsp chilli flakes - included in the original recipe but not here)
- 1 lemon, zested and juiced
- 15g anchovies
- Olive oil
- 2 onions, sliced thickly
- 3 garlic cloves, smashed but not crushed
- 1 tbs capers
- 1 handful black olives
- 1 glass white wine
- 1 tin plum tomatoes
Directions
- Step 1 Unroll the lamb breast and lay it out on a cutting board. Season generously with salt on both sides. On the inside surface add the dried oregano, lemon zest and anchovies. (if you wish to add chilli flakes add these here too), Re-roll the meat and tie or use small elastic poultry bands to hold it together.
- Step 2 Put a frying pan on your heat source (Kamado or hob). Add some olive oil and roll the lamb around the pan until it takes on some good colours all over.
- Step 3 Cut the onions into large chunks. Set the meat aside, add a little more oil and the onion put straight into the same pan to fry with the partially crushed garlic. Add. the capers and cook through, followed by a little more lemon zest.
- Step 4 Deglazed the pan with white wine and a good squeeze of lemon juice. Add the tinned tomatoes and gently crush and stir into the mix. Add the olives then place the rolled lamb on top and we were ready to go.
- Step 5 If cooking on a Kamado like the BGE set up for indirect cooking at around 140C. (If cooking indoors this needs to be covered with a lid or a foil top to prevent too much liquid loss. It can then be placed in the oven on 170C for 2 – 2.5 hours.)
- Step 6 On the BGE, leave the dish uncovered and cook for 3-4 hours until reach a core temp of between 88-93C. After around 3 hours, lift out the lamb, stir the sauce and check on consistency. Add water if necessary. Once the core reaches around 90C remove the meat and allow rest before carving Check the final consistency of the sauce and modify if necessary.
- Step 7 When ready to serve, remove the bands or butchers string and carve into generous slices. Serve directly on the sauce.


 The meat used for this first ‘run out’ of this recipe was wagyu shoulder. Beef shoulder is often referred to as Chuck and I would suspect that any chuck would work well in this recipe! Using substantial chunks of meat when making a ragù has the enormous advantage that they are easy to manage at this stage when trying to get colour onto the meat. It is that Maillard reaction that brings so much extra flavour to dishes.
  The chunks of beef were dried and then seasoned generously with salt. The beef was then fried at a high heat in a pan with a little olive oil, making sure that all sides of the meat were browned. This could be done on the BGE but on this occasion these first stages were done on a domestic hob in the kitchen. Whilst the meat was browning a large onion was halved and diced reasonably finely. The meat was then removed from the pan and set to one side.
 As the onions started to sauté 2 sticks of celery were finely chopped and added to the pan with a little more olive oil and fried on a medium heat for around 4 minutes.
 As the sofrito was cooking the San Marzano tomatoes were chunked and then very finely blended with a stick blender. Normally a passata is sieved to remove the seeds and skin. When it is blitzed in this way though it is not really necessary and there is far less waste. The blitzed tomato was going to be used with some conventional passata to add some sweet freshness.
 This was left to simmer for a few minutes to drive off the alcohol before adding the tomato pulp and the passata. The pan was then brought to a gentle simmer. If we were going to finish the cooking in a conventional oven this would be the time to add a close fitting lid before putting it in the oven at around 180C for around 90 minutes. We were, however, going to cook the ragù on the BGE set up for indirect cooking at between 150-160C.
 Once the meat is meltingly tender the casserole can be removed from the Big Green Egg for the next stage in the process. As we started off with large chunks of meat we then needed to break up the meat into the sauce. The easiest way to do this is with a whisk. The whisk is simply used to bash the meat until it breaks down to the required consistency as in the picture. The ragù can be used straight away or left to mature overnight. If anything it is a little better on the second day!
 We were serving the ragù with home made egg pasta. Hopefully we will publish this later. We were going to use a very traditional Tuscan Pappardelle pasta which is usually around 2cm wide and around 25cm long.
 All that is left to do is pop open a good bottle of Italian red, and serve the pasta on the plate or bowl of your choice. ideally the serving dish for this sort of pasta should have a flat base. This traditional way of serving the dish has the practical advantage that the pasta can be spread out.

 We had decided to take the leisurely approach to this dish which therefore started out with an overnight marinade (though a couple of hours would probably be fine too!). The chicken pieces were kept with the skin on and were seasoned with salt and freshly ground black pepper. They were put into a container and bay leaves, rosemary and a crushed clove of garlic were added. The container was topped up with the red wine and it was popped into the fridge to work its magic overnight.
 The BGE was set up for direct cooking at around 180C. The chicken was drained and the marinade reserved. After removing the chicken it was dried and very lightly dusted with seasoned flour, the excess shaken off. The pans were heated on the BGE and a little oil was added. The chicken was then browned off making sure the fat was well rendered from the skin.
  This can be done in a shallow casserole or a handleless frying pan such as the Tefal Ingenio pans. We were using the MiniMax which easily accommodates the pans we were using. Once beautifully coloured, the meat can be set aside.
 The temperature of the EGG was dropped to around 130C and the casserole left to very gently bubble. As we were cooking in the BGE there was no need to put the lid on the Dutch oven allowing a gentle smokiness to add to the flavour of the dish.


 Preparation is simplicity itself; the BGE was set up for indirect cooking with the platesetter in place. Once the temperature stabilised at around 180-200C we needed a solid metal surface to add some colour to the aubergine slices. A plancha, skillet or in our case a stainless steel searing plate was perfect. We usually just oil it and pop the aubergines on flipping them as they take on colour. In batches, these were cooked for 10-15 minutes turning once during the cooking. They were then put to one side to cool.
 We swapped out the searing plate for our Tefal Ingenio frying pan. This could have been used to brown the aubergine slices which would have made this a true one pan cook. Once the pan was hot we added the butter, garlic slices and the sage leaves and cooked for a few minutes to infuse their taste into the butter.
  To this was added one can of San Marzano tomatoes and as they usually come as whole tomatoes they were gently crushed and mixed with the infused butter and seasoned. If cooking on a hob or stove top I would add around one third of a can of water to the tomatoes and leave them to bubble gently for around 20 minutes until the sauce thickens and the flavour deepens. Cooking on the EGG is the same except that you only add a touch of water, just enough to rinse out the can. This is because the cooking in the EGG retains so much moisture. To cook the sauce it is worth just closing down the vents a little and dropping the temperature to around 180C.
 Whilst the sauce was cooking we put the ricotta into a bowl, grated in the zest and added the juice of half a lemon and two thirds of the grated parmesan. It was seasoned to taste with just a little salt and pepper. One heaped teaspoon of the mix was placed at one end of the aubergine and this was then rolled up into a cylinder containing the mix. Once the sauce was cooked the rolled aubergines were pushed into the sauce with the seam at the bottom.
 A drizzle of olive oil was poured over the involutini and some sage and torn basil leaves scattered over the top. This was followed by the remains of the lemon infused ricotta and the rest of the parmesan. The dish was then returned to the Big Green Egg for the final part of the cook. It takes around 25-30 minutes to cook this through. If the top doesn’t brown as you would like, it can be popped under a grill for a minute or so (or under the flame of a pizza oven for 30 seconds!).


 This recipe started out as one of the many on their site
  As the food processor had already been used we also blitzed the onions and then cooked in the same pan as we had the mushrooms. After a minute or so the chopped garlic was added. We have also come to add the red pepper (which we use instead of the chilli in the original recipe) at this stage. This was softened with the onions. (We have also done them separately and added them back in when the mushrooms were added back – but this is just easier).
 The onions were cooked until translucent at which point the spice mix was then stirred through and cooked for another minute or so.
 The onion, garlic, pepper and spice mix was transferred to a Dutch oven together with the 2 tins of beans. This was then put into the EGG and allowed to warm through. Once warmed, the tomato puree, tinned tomatoes, tamari, vinegar and wine were all added to the pot and gently mixed together. The whole dish was brought to a very gentle simmer without the lid to cook off the alcohol and allow the liquids to reduce a little.
 Finally, the mushrooms, (the sautéed peppers if you choose to cook them separately), chocolate and maple syrup were added and stirred through the dish. As you will see from the picture we had slightly misjudged the volume of the ingredients. The pan was very full to say the least. Normally we would have cooked this for around 90 minutes or so at around 150-160C. Because the pan was so full we cooked at around 110C instead. This proved to be a great decision!
 At 110C we ended up with a very slow cook taking around 5hrs. During this time the volume reduced, though only a little, and the colour deepened. More importantly the taste took on a really complex richness, more than we have had before. It will be ‘low and slow’ for this dish from now on!


 The chicken drumsticks were therefore put into the second pan with the chicken breast, skin side down, and the cooking continued. We did this as a little challenge as clearly we could have done this more easily on the large BGE. Using the large BGE we would have had plenty of room for both pans at once. Doing this in the MiniMax means it is necessary to ‘swap over’ the 2 pans. This is why we were cooking directly, unlike on the previous occasion when we cooked the
 Once at temperature the chicken was wrapped in foil and covered with a clean tea towel to rest. The potatoes had some fresh rosemary and sea salt sprinkled over the top and were finished off on the EGG.


 Meanwhile a little olive oil was heated in the 8 inch BGE drip pan which we had with us – really too large for the Mini BGE it was all we had that was large enough to make the dish and allow closure of the lid – just! The chopped shallots were added to the pan and softened, then the sliced garlic cloves were added and cooked a little before the tomatoes were added the halved baby tomatoes first to lightly fry off then the tinned tomatoes and red wine.
 This was then all allowed to simmer until the volume was reduced by about a third. The tomatoes were mashed until reasonably smooth, seasoned and had a little basil and sugar added then left to simmer for a further 10 mins.
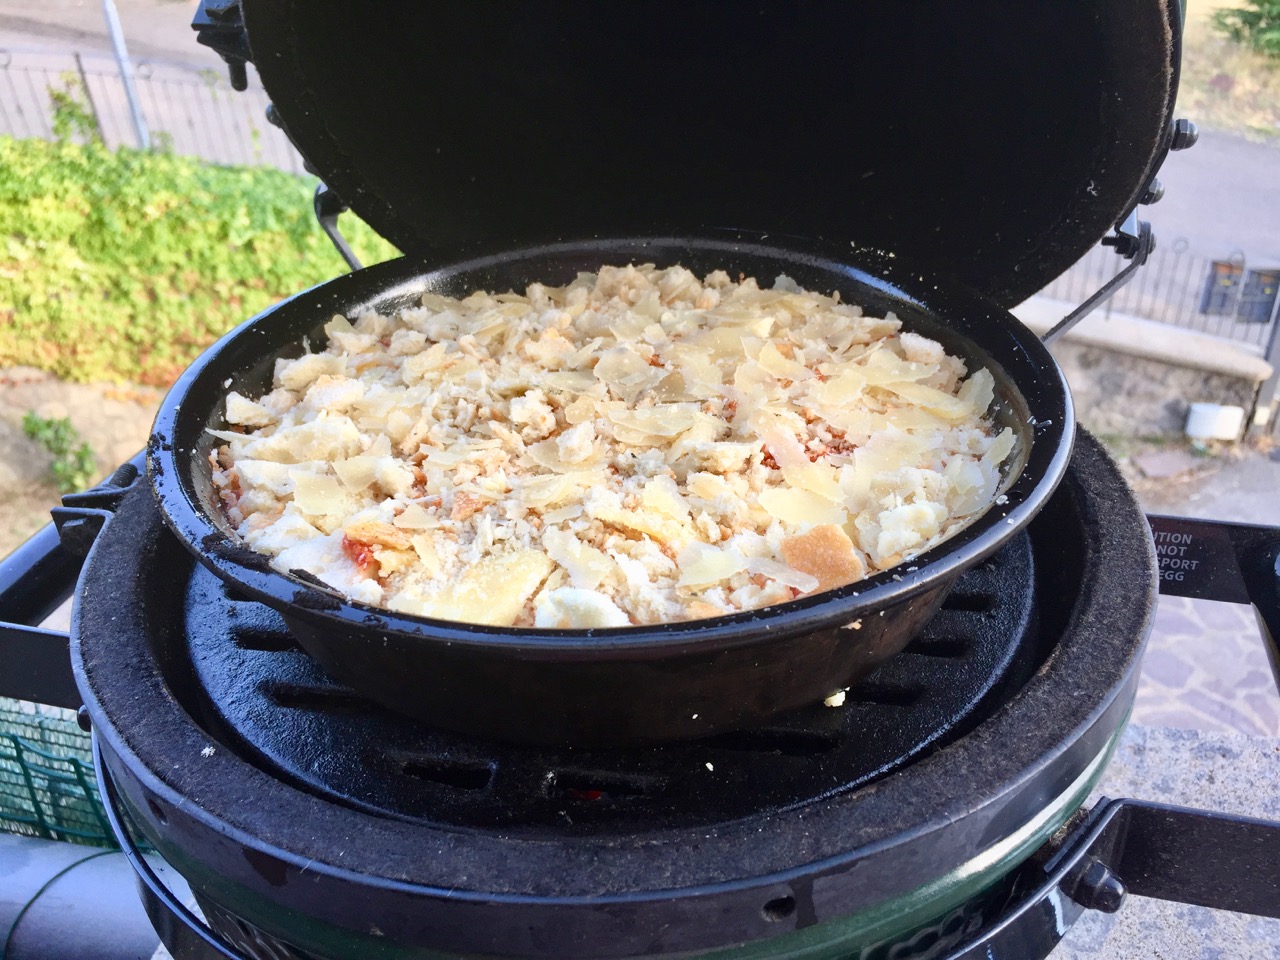
 One of the recipes I found suggested adding a layer of stale breadcrumbs at the end and then topping this with the remains of the cheese.Italian bread goes stale so quickly we had a ready supply! The breadcrumbs were tossed with a little olive oil and Parmesan and sprinkled on top. Put back in the EGG it was baked for about 40 minutes. I was hoping for a lovely bubbling crispy top but that was not to be.


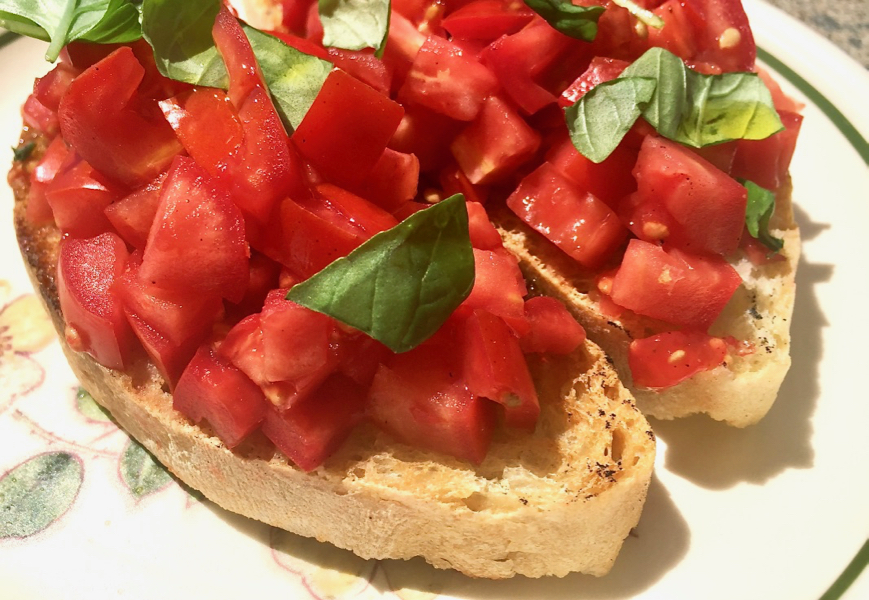
 Whilst the toast was cooking it was time to chop up a couple of ripe tomatoes – if they have lots of seeds squeeze some of them out and discard and chop the tomato flesh into chunky pieces. Take the toast off the grill and rub the “most toasted side with a clove of garlic – don’t peel it first simply cut off the base and use the toast to act like sandpaper and wear away the garlic (this is why slightly stale bread works best!)


Recent Comments