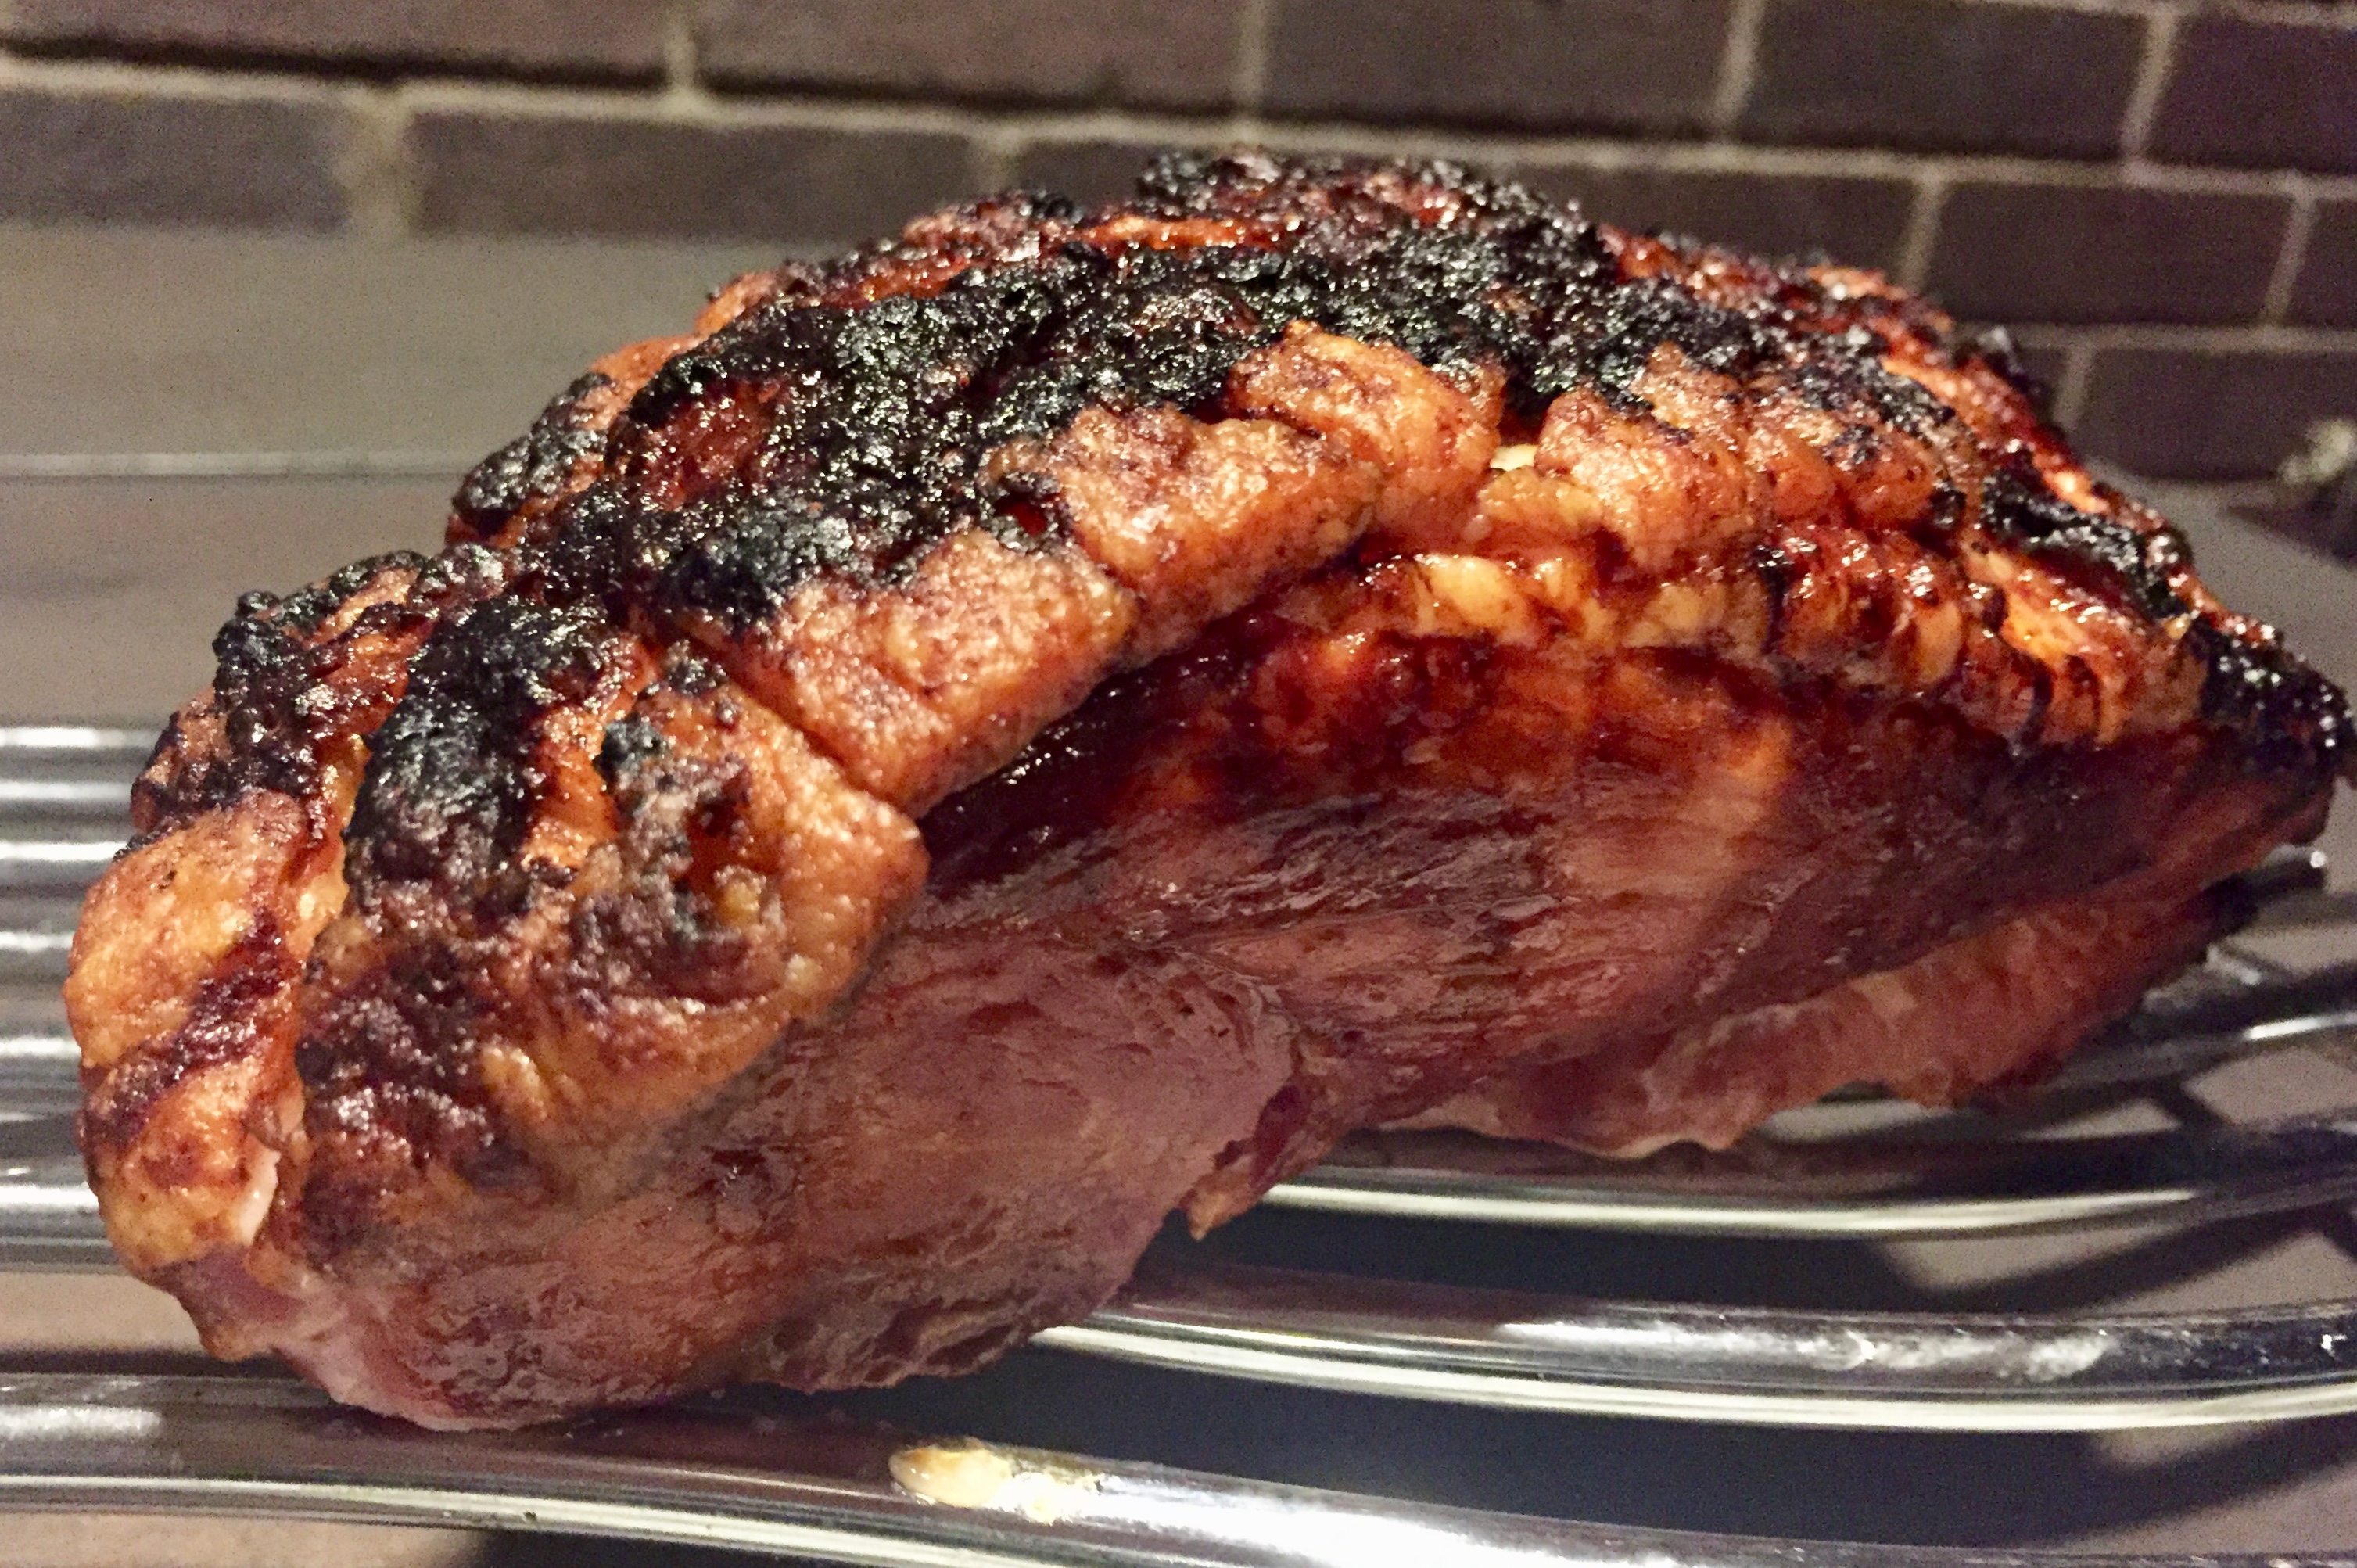
What's Cooking?

Spicy charred chicken breast with chorizo potatoes

Spicy charred chicken breast with chorizo potatoes

Whilst chicken can be bland it really doesn’t need to be!  This is a really simple recipe and almost a one pan dish too.  We had taken 2 chicken breasts from a large free range organic chicken.  The skin was left on the chicken and the breasts were lightly dusted with a Shawarma seasoning from Angus and Oink.  They were set aside for an hour or so.  We paired this with chorizo sautéed potatoes, based on our earlier recipe with asparagus, so whilst the chicken was marinating the new potatoes were halved and parboiled and also set aside.

The BGE was set up for direct cooking at around 180C.  A handleless sauté pan was brought up to temperature and the chorizo was fried in rapeseed oil added to the pan.  This both cooks the chorizo and in turn spices the oil.  The chorizo was removed from the pan and replaced with the breasts of chicken, skin side down.  The idea is to do around 80-90% of the chicken cooking with the skin side down with the skin protecting the chicken from the heat.  The chicken was flipped over to finish off the cook.  The parboiled potatoes were added to the pan to sauté the potatoes in the chorizo infused oil.  The chicken was removed from the pan when the core temperature hit just above 70C.  They were wrapped in foil and allowed to rest whilst the core temperature rose to 74C.  The cooked chorizo was added back to the potatoes as they finished being sautéd.

The chicken was sliced and served on roasted cauliflower together with the spicy chorizo potatoes.  The level of spicing will depend on the type of chorizo you choose!

…………………………a great way to spice up your chicken!!


Footnote: Also see reflections here


Spicy Charred Chicken Breast with Chorizo Potatoes

July 15, 2019
: 2-3
: 15 min
: 20 min
: 35 min
: Easy

Spicy Chicken breast roasted with chorizo sautéed potatoes

By:

Ingredients
  • 2 chicken breasts skin on
  • Shawarma seasoning from Angus and Oink
  • New potatoes
  • Chorizo 3 inch piece
  • Rapeseed oil
Directions
  • Step 1 Leave the skin on the chicken and dust lightly with Shawarma seasoning. Set aside for an hour or so.  Meanwhile halve the new potatoes and parboil then set aside.
  • Step 2 Set up the BGE for direct cooking at around 180C.  Use a handleless sauté pan and bring to temperature. Fry the chorizo in rapeseed oil. Remove the chorizo and replace with the breasts of chicken, skin side down.  Cook without moving until around 80-90% cooked.  Turn the chicken and finish off the cook. Add the parboiled potatoes and sauté.
  • Step 3 Remove the chicken from the pan when the core temperature hits 70C.  Wrap in foil and allow to rest to allow the core temperature to reach 74C.  Add the cooked chorizo to the potatoes as they finish being sautéd
  • Step 4  Slice the chicken and serve with the spicy chorizo potatoes

Chorizo sautéed new Potatoes with Asparagus

Chorizo sautéed new Potatoes with Asparagus

There are almost as many ways of sautéing potatoes as there are varieties of potatoes, but this is one we have used with quite a lot of dishes recently.  It makes a great tapas dish or a side for other main centre pieces.  We were using Jersey Royal new potatoes which were halved and parboiled for between 8-12 minutes until they were just beginning to soften.  They were then drained and shaken a little in the pan to gently ‘roughen up’ the edges of the potatoes.

The BGE had been set up for direct cooking at around 180C.  We have been using some ‘handless” frying/sauté pans from Tefal – these work perfectly on the BGE.  They work most easily (the handle is clicked off more easily) when the cooking grid is at the level of the gasket, and so are easier on the MiniMax than the Large for instance.   The pan was brought up to temperature and the chorizo was fried in rapeseed oil added to the pan. This both cooks the chorizo and in turn spices the oil.  The chorizo needs to be removed from the pan once it has released some of its flavour but before it fully cooks through.  The par-boiled potatoes were then added and allowed to sauté.  Remember to cook with the lid down, opening just to toss the potatoes round the pan.  Once the potatoes are cooked through and colouring up beautifully the chorizo was reintroduced together with a large handful of asparagus – cut diagonally into 3 cm pieces as in the picture above. The mix was cooked for a further 2-3 minutes and then served.


…………………………really simple and can be used in so many ways!!


Spicy Charred Chicken Breast with Chorizo Potatoes

July 9, 2019
: 2-3
: 10 min
: 20 min
: 30 min
: Easy

Chorizo sautéed potatoes with asparagus

By:

Ingredients
  • New potatoes, halved
  • Chorizo 3 inch piece
  • Rapeseed oil
  • Asparagus chopped into 3cm pieces on the diagonal
Directions
  • Step 1 Halve the new potatoes and parboil then set aside.
  • Step 2 Set up the BGE for direct cooking at around 180C.  Use a handless sauté pan and bring to temperature. Fry the chorizo in rapeseed oil.  Remove the chorizo and replace with the parboiled potatoes and sauté.
  • Step 3 Add the cooked chorizo to the potatoes and asparagus as they finish being sautéd
  • Step 4 Serve immediately


Roast boned leg of Venison (red deer)

Roast boned leg of Venison (red deer)

We are very fortunate in having friends who have access to wild venison but don’t like it!  This means that we are sometimes recipients of generous pieces to cook.  On this occasion it was a (more…)

African Spiced Roast leg of Pork

African Spiced Roast leg of Pork

We seem to have had a spate of ridiculously cheap pork on offer at our local supermarket recently.  We buy most of our meat from one of a couple of very fine butchers we have locally.  Nevertheless, even when you are not looking to buy a leg of pork, if it is offered to you at £2 per kg, there is a real need to go and look for a recipe.  I am always a little cautious of expecting too much from inexpensive meat and so this African inspired spiced pork recipe from my friend Julie from Meat Smoke Fire Ltd seemed a perfect way of using this leg of pork.  The spicing inspiration is African and by using a ready made Harissa mix as the basis for the marinade is very straightforward and would cover any slight blandness that you may suspect with commercial supermarket pork.  Equally, whilst this is a roasted dish, the basting of the meat with the lemon and wine stock adds an element of a ‘braise’ and would hopefully add some tenderness to the meat.

To make the marinade the herbs and spices (oregano, caraway seeds, cumin seeds, marjoram or savory, turmeric) were ground in a mortar with 1tsp of course sea salt.  This was then added to 3 crushed cloves of garlic, 2tbsp of ready made Harissa and 60ml of olive oil to make a paste.  We took the skin off the pork but left as much of the fat in place as possible.  The meat was then slashed to make 8-10 deep cuts and the paste was rubbed all over the meat and into the slits.  The meat was then covered and left to marinade at room temperature for an hour or so.

The Big Green Egg was set up for indirect cooking with platesetter in place (feet up).   A little cherry wood was also added as a final ‘spicing’ for the mix.  All that was left to prepare was to quarter 2 onions lengthways and to mix the lemon juice and white wine. These were then set to one side.

When ready to cook, the pork was placed fat side down in the roasting dish and cooked for about half an hour.  The meat was then removed from the roasting dish and the quartered onions were arranged in the centre as a trivet. The pork was turned fat side up and placed on the trivet of onions. The lemon and wine mix was then poured over the top of the meat.  The EGG was closed and left to cook for another 40-60 minutes opening to baste the meat with the cooking juices every 10 minutes or so. Once the internal temperature reached around 70C the meat was removed, wrapped in foil and left to rest for at least 20 minutes.   The cooking juices were reduced to form a pouring sauce.  The meat was generously sliced and served with cauliflower and the roasted onions.  The cauliflower was a perfect foil for the spicy pork and carried the spicing from the sauce beautifully.

I would highly recommend giving the dish a go.   The results were spicy but not too hot, and very very tender!!

…………….if you want to add a little spice to your roast pork now is your chance!

African Spiced Roast leg of Pork

June 24, 2019
: 6
: 15 min
: 1 hr 30 min
: 1 hr 45 min
: Easy

Roasted skinless leg of pork with African spices

By:

Ingredients
  • 1tsp coarse sea salt
  • 2tsp dried oregano
  • 2tsp caraway seeds
  • 1tsp cumin seeds
  • 1tsp dried marjoram
  • 1/2tsp turmeric
  • 2tbsp harissa
  • 3 crushed cloves garlic
  • 60ml olive oil
  • 1.5kg boneless pork leg roasting joint - skin removed
  • 60ml lemon juice
  • 80ml dry white wine
  • 2 large onions, peeled and quartered
Directions
  • Step 1 For the marinade: grind the oregano, caraway seeds, cumin seeds, marjoram and turmeric in a mortar with 1tsp of course sea salt.  Add this to 3 crushed cloves of garlic and 2tbsp of ready made Harissa and 60ml of olive oil to make a paste.  Slash the meat after the skin is removed to make 8-10 deep cuts. Rub the marinade paste all over the meat and into the slits.  Cover and leave to marinade at room temperature for an hour
  • Step 2 Set up the Big Green Egg for indirect cooking with platesetter in place (feet up).   Add a little cherry wood.
  • Step 3 Quarter 2 onions lengthways. Mix the lemon juice and white wine and then set these to one side.
  • Step 4 When ready to cook, place the pork fat side down in the roasting dish and cook for about half an hour.  
  • Step 5 Remove the meat from the roasting dish add the quartered onions in the centre as a trivet.  Turn the pork over and sit on the onion trivet. Pour the lemon and wine mix over the top of the meat.  Close the EGG and leave to cook for another 40-60 minutes. Baste the meat with the cooking juices every 10 minutes or so.  
  • Step 6 Remove once the internal temperature reaches 70C and wrap in foil to rest for at least 20 minutes.  
  • Step 7 Reduce the cooking juices to form a pouring sauce.  
  • Step 8 Slice the meat and serve with cauliflower and the roasted onions.  
Dirty Steak (caveman or cowboy steak)

Dirty Steak (caveman or cowboy steak)

Dirty cooking?  Cooking the food you are about to eat directly onto the burning charcoal. It gets a whole series of names too: Dirty, Caveman, Cowboy. I have to say I have always been rather sceptical about the idea of this form of cooking.   Perhaps just an unnecessary gimmick, and (more…)

Venison leg and Onion Jam

Venison leg and Onion Jam

We were given a venison joint by a good friend!  The details of the beast from which it came were a little unclear – the cut was in doubt too (but probably boned leg)!  It was thought to be Roe Deer but we did not know how old the animal was.  When ever in doubt as to the age of the animal I tend to assume that it would be old.  This way we treat the meat as though it may be a little tough and cook accordingly.  So for this reason we planned a ‘slow cook,’ cooking at a low temperature but for a longer time. (more…)

Roasted cauliflower (with a truffle oil & toasted flax dressing)

Roasted cauliflower (with a truffle oil & toasted flax dressing)

I have to say I was a little sceptical about the idea of roast cauliflower cooked directly on the plate setter.  But food friends came across it once on their travels and my friend Nic Williams has always said this is one of the best vegetable dishes he has tasted  from the Big Green Egg.  I know he has demonstrated this many times and has adapted the original idea with a really fabulous dressing.  This particular recipe is taken

(more…)

Wild Garlic Focaccia on the large Big Green Egg

Wild Garlic Focaccia on the large Big Green Egg

Focaccia is a great bread to make on the EGG and works really well on the large BGE.  We have also made it on our Mini BGE when travelling, but that is more an act of bravado than practicality because of the size of the loaf you can make!!  The real advantage when cooking bread on the large (more…)

Slow-roasted caramelised fennel

Slow-roasted caramelised fennel

Whilst I have come to love the taste and aroma fennel seeds bringto many Tuscan dishes, I have only occasionally cooked with fennel bulbs. So with some fennel bulbs to use it was time to search the internet for something simple.  This is therefore based on a Jamie Oliver recipe for slow roasted fennel. It is a very simple recipe.  (more…)

Crispy Allendale Belly Pork

Crispy Allendale Belly Pork

Slow cooked belly pork is a real joy!  But is has become difficult to find good “fatty’ belly pork to allow the release of that beautiful ‘porky goodness’.  Understandably there has been a trend to produce less fatty pork for health reasons – and the logic of that is clear especially for ‘quick cook’ recipes.  By contrast, when it comes to true ‘low and slow’ recipes, they are designed to render that fat out of the pork (making it a more healthy option) whilst retaining those special taste properties that only fat layers can provide. (more…)

Bread cooking in the Mini Big Green Egg – the remake!

Bread cooking in the Mini Big Green Egg – the remake!

In the summer of 2018 we were in Italy with the Big Green Egg and thoughts again came to bread making.  We love Italian food but bread making does not seem to be their greatest triumph!.  We have to be straight before we start – the Mini Big Green Egg is not designed for bread making – it is really too small!  The fire ends up too close to the cooking vessel and there is not enough space in the dome to cook a decent size loaf.  So that should be the end of it – but of course it wasn’t! (more…)

Pork Rillettes

Pork Rillettes

I tend not to buy meat from supermarkets very often but when you see boned pork shoulder at £2 per Kg it is difficult to walk past without dropping 5Kg or so into the basket.  I have to say it wasn’t the most beautifully butchered piece of pork I have ever seen.  Nevertheless, we were going to make some rillettes and use the rest for a slow cooked Pulled Pork (see here) so it was worth a shot!  The added bonus was that I wanted to try and render my own pork fat to top the rilletes.  There was a lot of skin on this piece which would be great to render and would certainly not go to waste.

A classic pork rillettes is not a pâté, rather it is a long, slow-cooked pork dish. It is cooked in its own fat with a little stock, few herbs, garlic and seasoning. In a way it has more in common with pulled pork, but a pulled pork set in its own stock and fat. It is quite simply delicious to the point that I need to ration it – once started it is difficult to stop. Be warned!  Spread rillettes on toasted baguette or sourdough bread, sprinkle lightly with freshly cracked black pepper and salt for a light lunch or a quick starter.  Try it too with a little sweet chutney – not authentically French but a delicious combination nontheless.

The recipe is quite straightforward. Cut the pork into pieces about the size of a walnut.  Then add the finely chopped garlic, bay leaves, thyme, crushed juniper berries, cloves and the coriander as well as the Chinese 5 spice and Allspice together with a generous seasoning of salt and pepper. To this was added a couple of splashes of calvados and around 200ml of chicken stock to nearly cover the pork.  The pan was brought up to a very gentle boil and then transferred to an oven.  This can be done on the BGE where I would set the temperature to around 120C cooking indirectly, or just as readily at 120C (Fan) in a conventional oven.  I would do this in the BGE if I was cooking something else or if I wanted to add a little smoke to the spice mix.  In all honesty though it is perhaps a little easier in a conventional oven.  If doing on the BGE I would do this without the lid, but in a conventional oven with the lid in place.

After about 3 hours the meat should be sitting in a lovely liquid stock and have softened considerably.  At this stage it will easily breakup with the pressure of a fork.   To separate the liquid from the solids I would suggest putting the whole content of the pan into a sieve and gently squeeze the excess fluid from the meat and garlic residue.  Pop the liquid into the fridge to chill.

Put the meat and garlic back in the cooking pan and begin to shred the meat to the consistency you want.  I like it quite coarse with some body in the shredded meat. Some recipes suggest doing this in a food processor – personally I think this is a terrible idea and leaves you with a mousse not a rillette! Assuming the meat has been cooked for long enough it will break up with a fork very easily.  Once you have the meat broken down to the size you want, pack it loosely into ramekins.  It is packed loosely so that the reserved meat juices can be poured back into the meat.  It can then find a way of flowing round all the meat fibres.  When you take the reserved juices from the fridge a pure fat layer should have appeared on the top if you have left it for long enough.  Remove and reserve this fat layer.  Pour the meat juices into the ramekin stopping when the liquid just comes to the surface of the meat.  The ramekins were then allowed to chill further which allows some absorption of the meat juices.  The reserved fat can then be heated and gently poured over the rillette to seal it. The dishes are then left for at least 2hrs in the fridge to harden.  Left like this with the fat on the surface the rillette will keep happily in the fridge for around 10 days and the fat can be scraped to one side when serving.  If you are intending to use in the next day or so a simple cling film lid will do a similar job.  If you don’t like the idea of using pork fat to seal then an equally adequate seal can be made with melted butter.

……………………………. do give it a go!


Pork Rillette

April 24, 2019
: 12-14
: 1 hr
: 3 hr
: 4 hr
: Moderate

Slow cooked herbed and spiced pork transformed into a delicious meat delicacy

By:

Ingredients
  • Pork Shoulder or Belly 1Kg
  • Garlic 5 large cloves
  • Bay leaves 4
  • Thyme
  • 10 Juniper berries
  • 4 Cloves,
  • Coriander, quarter tsp
  • Chinese 5 spice, quarter tsp
  • Allspice, half tsp
  • Salt and pepper.
  • Calvados a large splash
  • Chicken Stock around 200ml
Directions
  • Step 1 Cut the pork into pieces about the size of a walnut.  Then add the finely chopped garlic, bay leaves, thyme, crushed juniper berries, cloves and the coriander, Chinese 5 spice and Allspice together with a generous seasoning of salt and pepper. Then add a couple of splashes of calvados and around 200ml of chicken stock to nearly cover the pork. (ideally leave to marinade overnight though this is not essential)
  • Step 2 Put the pan on the heat and bring up to a very gentle boil and then transfer to an oven.  This can be done on the BGE indirectly at a temperature of around 120C or just as readily at 120C (Fan) in a conventional oven.  If doing on the BGE I would do this without the lid, but in a conventional oven with the lid in place.
  • Step 3 After about 3 hours the meat will have softened considerably.  Separate the liquid from the solids using a sieve and gently squeeze the excess fluid from the meat and garlic residue.  Pop the liquid into the fridge to chill.  
  • Step 4 Put the meat and garlic back in the cooking pan and shred the meat to the consistency you want.  Pack the meat loosely into ramekins. Take the reserved juices from the fridge and remove the solidified fat layer. Pour the meat juices into the ramekins stopping when the liquid just comes to the surface of the meat.  Allow ramekins to chill. Gently heat the reserved fat and pour over the rillette to seal it. Leave the dishes for at least 2hrs in the fridge to harden.  The sealed rillette will keep happily in the fridge for around 10 days


Apple Tarte Tatin

Apple Tarte Tatin

Probably the last thing that people think of cooking on a BBQ are puddings but this is really missing a trick.  A classic Tarte Tatin is a great dish to do in the Big Green Egg.  It is relatively straightforward, looks complicated, benefits from a little smoke and tastes delicious!  This recipe was given to my by my friend Nic Williams (more…)

La Scottiglia

La Scottiglia

For some years now we have visited a delightful restaurant in Tuscany called La Scottiglia in the village of Pescina on the side on Monte Amiata.  We have always been looked after exceedingly well there and it is a place we frequently recommend. They do an excellent wild boar dish, and sometimes a delightful wild boar ragù.  It has reached the point where when we arrive, if these are available they (more…)

Making the most of the heat – Short ribs cooked over a pork Ragù

Making the most of the heat – Short ribs cooked over a pork Ragù

When slow cooking there is often an opportunity to make extra use of the available heat.  The Big Green Egg is thermally very efficient and uses little charcoal especially when doing a slow cook.  Nevertheless, there is often scope to (more…)

A bit of a find – STONEHOUSE SMOKERY

A bit of a find – STONEHOUSE SMOKERY

We were having a bit of a wander around Hexham’s excellent Farmers’ market on a Saturday morning in March and came across what looks like quite a find.  Wrapped up against a bitter wind we met Lee Scrimgeour and his colleague from Stonehouse Smokery in Cumbria.  They had made their way across the Pennines from Carlisle in the teeth of a March blizzard in the west.  Their reward a little welcoming watery sunshine but a bitter wind!

We were recompensed however by Lee’s boundless enthusiasm and some glorious tastes that transported us, at least metaphorically, to a much warmer Tuscany!!  First up was a delightful wafer thin, oak smoked Coppa (see picture left).  This was deliciously soft and moist, something often difficult to achieve in a Coppa.  This was quickly followed by a very satisfying  pancetta, cured with lemon zest and pink peppercorns and then topped off by a rich and creamy guanciale, something I have not found before locally in Northumberland.

I was really intrigued to find such wonderful charcuterie from a reasonably local supplier.  These were every bit as good as the cured meats I have encountered in Italy, France and Germany.  Interestingly, they really seemed to capture that essence of Tuscan Salumi, rather than other European charcuterie. They were very distinctive and full of local character.  Each region tends to use different herbs and spicing for their cures.  Clearly Lee, as a former chef, is following in that overall tradition.  I have only rarely come across smoked Salumi in Italy but as you might expect from Stonehouse Smokery, these delightfully cured meats were smoked.  Having said that, the smoking was extremely gentle in the samples we had and just added a further level of flavour to these delightful pork offerings!

Lee set up Stonehouse Smokery at Moorhouse, near Carlisle in 2017 to produce fine cured meats and charcuterie.  From the brief encounter we had on Saturday he certainly seems to be succeeding.  If you are looking for something just that little bit different, look them up online.  I am really looking forward to taking up Lee’s invitation and visiting Stonehouse Smokery later in the year and sharing some more of Lee’s delightful products.


Greek Lamb and Roast Potatoes

Greek Lamb and Roast Potatoes

The idea of Greek lamb and roast potatoes takes me back to Athens in 2004 when we were invited to a friend’s wedding there.  Michalis was working on his PhD with me in the UK and very kindly invited Jackie and I to his wedding which was a spectacular affair!  Before the wedding though we had some time with Michalis and his family.  On one day before the wedding his mum cooked lamb and roast potatoes – and they were very special – soft roast potatoes full of meat juices and hinted with lemon, perfectly reflecting the meat – fabulous!    When we found a recipe that looked as though it was going to deliver something along the same lines I was excited – that it came from the pen of a 2 star Michelin Chef (Tom Kerridge) even better!
(more…)

Red Deer Osso-Bucco

Red Deer Osso-Bucco

We had very much enjoyed the Osso-Bucco we made on the Big Green Egg last year (see here) so when we came across some Red Deer shin cut in the same way as veal for Osso-Bucco it seemed too good an opportunity to miss.  The pieces were smaller than when using veal but that would give the advantage of hopefully more marrow being released into the sauce when the meat was braised.  As the venison was likely to be a little more robust than the veal, the sauce was made with a little more tomato and a combination of Bay, Thyme and Oregano to match the richness, so a further step away from the Milanese original but exciting because of that!

The venison was no thicker than the veal we used last time but the diameter of the pieces was less.  I did wonder if we could dispense with the butchers string tied round each piece to preserve the meat intact, but in the end we decided to tie the pieces anyway These were then lightly floured and seasoned, then gently caramelised in butter in the Dutch oven to intensify their flavour.  They were then set to one side.

A little more butter was then added to the pan and the onions were sautéd to slightly soften, then the carrots and celery were added and lightly cooked.  At this point we added 4 garlic cloves, the zest of 1.5 lemons, 2 Bay leaves, some dried Thyme and Oregano and cooked for a few minutes more.  There is no place for mushrooms in an authentic Osso-Bucco – but they had worked well for us last time and seemed even more appropriate with venison, so these were added together with whole and halved stuffed green olives  that we had to hand!.  We also added 2 cans of chopped tomatoes to add further richness to the sauce.  Then all that was needed was to add the white wine.  The heat was turned up to begin to concentrate the sauce.
After about 10 minutes the meat was tucked in between the vegetable mix and the dutch oven was moved out of the kitchen and onto the Big Green Egg.  This had been set up for indirect cooking at around 120C.   Once gently bubbling, hot chicken stock was added.  The pot was allowed to simmer in the closed EGG without its lid.  As we have said previously cooking without the lid on the Dutch oven works well in the EGG as the EGG naturally retains moisture in the food being cooked so the pan does not tend to dry out, but the absence of the lid allowed the whole dish to pick up some very gentle ‘smoky tones’ from the charcoal. This time we also added a little Chestnut wood to the fire to add further gentle smoky overtones .

The pot was then cooked very gently for around 3hrs making sure the meat was kept moist by the surrounding sauce.
An occasional gentle stir allowed us to make sure the venison remained below the surface of the liquid and let us keep an eye on the cooking process.

As the dish cooked it took on a wonderfully unctuous character as the sauce became richer and looked to be a good match for the venison.  The venison softened but held together well.  The meat was removed from the sauce, covered with foil and set aside in a warm spot whilst the sauce was finished.  Sometimes, at this point it is worth adding a suspension of cornflour in cold water if the sauce is a little runny and just a fresh sprinkle of herbs in the last few minutes of cooking.  The sauce was finished by adding a few dots of butter and stirring.  The string was removed from the meat before serving with the sauce.  It works really well with plain rice though my favourite is with some crispy roast potatoes and broccoli or a root vegetable.  This is a delicious dish and the sauce with the enriched bone marrow is delightful, but it does have one downside and that is we are yet to find a delicate way of plating it!.  This has been the same with the Veal Osso-Bucco that we made earlier and with this Venison version too.  I think if we could find a supplier with whole shin we would get them cut at around 4cm thick. I think they would then hold their shape a little more easily and that would make plating easier too.

A note for next time – with the size of our dutch oven there was perhaps a little too much meat to manage easily – so next time perhaps reduce the volumes a little!!

Red Deer Osso-Bucco

February 19, 2019
: 6-8
: 1 hr
: 3 hr
: 4 hr
: Straight forward

Osso-Bucco made with Red Deer Venison in a rich tomato enriched sauce

By:

Ingredients
  • 2.1 kg of Shin Venison
  • Length of butchers string to tie round each piece of meat
  • Seasoned flour
  • Knob of butter
  • 3 large Onions finely diced
  • 2 Large carrot finely diced
  • 6 sticks of celery finely diced
  • 4 large garlic cloves whole
  • Lemon zest
  • Bay leaf
  • Dried Thyme
  • Dried Oregano
  • 2 Glasses of white wine
  • Chicken stock/2 chicken stockpots
  • 2 Large cans of chopped tomatoes / fresh tomatoes
  • Handful of whole and halved stuffed green olives (optional)
  • Chestnut mushrooms (optional)
Directions
  • Step 1 Tie some butchers string around the circumference of the meat to hold it together whilst cooking. Lightly dust with seasoned flour and caramelise in butter in the Dutch oven. Then set to one side.
  • Step 2 Add a little more butter to the pan and sauté the onions to slightly soften. Then add the the carrots and celery and cook lightly.  
  • Step 3 To this gently cooking mixture add the whole garlic cloves, the lemon zest, a bay leaf and some sage and cook for a few minutes more.  Add the sliced chestnut mushrooms, olives  and together with a can of chopped tomatoes bring back to the simmer.
  • Step 4 Add the white wine and turn up the heat to begin to concentrate the sauce.  After about 10 minutes tuck the meat back into the vegetable mix and put the dutch oven into the Big Green Egg set up for indirect cooking at around 120C.   Once gently bubbling, add the hot chicken stock (or stockpot) and leave to simmer without the Dutch oven lid, in the closed EGG.  
  • Step 5 Cook very gently for around 3hrs making sure the meat is kept moist by the surrounding sauce.  Gently stir the sauce occasionally without disturbing the meat too much.  
  • Step 6 If the sauce requires any thickening do so with a little cornflour premixed in some cold water and finish off the sauce by adding a few dots of butter and stirring it in once the meat has been removed.
  • Step 7 Remember to snip off the string used to hold the meat together before serving.


When is a gammon not a gammon?!

When is a gammon not a gammon?!

The simple answer is of course once it is cooked it is then referred to as a “Ham”.  What ever we call them this is a delicious  way of eating pork and in the UK is always associated with the Christmas period – but it it too good to confine to Christmas!  There are so many different types of gammon available depending on how they have been cured and each of these produce slightly different types of ham. (more…)

Smoked Venison Ragù

Smoked Venison Ragù

We had planned to make a very rich casserole using some cubed shoulder of wild venison that we had picked up just before Christmas.  With all the festive excitement it had been popped in the freezer.  Once defrosted I was a little disappointed to see that the cubes were a little smaller than I had thought – it was clearly not destined to make a venison equivalent of “Daube of Beef”.  A quick rethink took us from France to Italy and from Daube to Ragù!  The recipe is simplicity itself. (more…)

Our Christmas Terrine

Our Christmas Terrine

Having finally come to the conclusion what we were going to include in the Christmas Terrine it was time to put it all together!!  The one thing we have learned this year making terrines is that (more…)

Game Terrine – getting in practice for Christmas

Game Terrine – getting in practice for Christmas

We had fun making terrines on the Big Green Egg over the summer when on holiday in Tuscany.  So now it was time to put some of that experience together as we get ready for Christmas.   (more…)

Rabbit served Tuscan style

Rabbit served Tuscan style


This is really a footnote to the recipe “Slow cooked rabbit with boozy apricots”.   Slow cooked meat dishes with a rich sauce are often served in the same way that the Tuscans serve their rich soups, (more…)

Slow cooked rabbit with boozy apricots

Slow cooked rabbit with boozy apricots

Rabbit has been a European staple for certainly the last 3000 years and was introduced into Britain by the Romans in the first century AD under the Emperor Claudius.  Its popularity throughout Europe has remained strong but in the latter half of the last century became much less common in Britain.  This is a real shame as it is an excellent protein source and a reasonably versatile meat.  On the whole it should be cooked either very quickly or very slowly – when it can be fantastic – cooked somewhere between these extremes and it tends to be tough, dry, or both!

The way we have cooked it here is a slight variation on Jackie’s classic rabbit with prunes recipe which we have enjoyed together for the last 40 years or so!  This particular recipe is cooked with ‘boozy apricots’ (more…)

Nicola’s Pumpkin and blue cheese fondue

Nicola’s Pumpkin and blue cheese fondue

My friend Nicola has been playing with last month’s pumpkin recipe a little but to great success as you can see in the pictures.  She made a couple of small modifications from the one we published a couple of weeks ago and I thought they would be good to share.   (more…)

Over the top Ham! – Don’t waste an opportunity!

Over the top Ham! – Don’t waste an opportunity!

The opportunity for little innovations are part of the pleasure of cooking for me!  This weekend produced a perfect example.  We were doing a slow cooked Pork and Pulled Pork Ragù (more of that later) and we also had a small cured ham to prepare for the following weekend.  When cooking a gammon to make ham I normally do this over a container to collect all those lovely cooking juices from the developing ham, so they can be used later.  Sometimes, especially if not enough water has been added to the collection tray – the juices can burn and spoil.   This time however we sat the developing ham on a grill that in turn sat on the Dutch Oven containing the ragù.  This was in just  the same way as you place the meat when you cook ‘over the top’ chilli – see here.

The meat juices simply dripped from the ‘Over the Top Ham” directly into the developing sauce!  The only difference this made to the cooking of the ragù was that the addition of some of the stock and the salt and pepper was delayed till near the end of the cook so the final taste could be balanced appropriately after the addition of the cooking juices from the ham

And finishing off the Ham?  Well, as the ragù was cooking at 135C, once the Ham was approaching the desired internal temperature, it was removed from the EGG coated in sweet Bavarian mustard and finished off for 10 mins in a hot domestic oven at 180C – simple!


Pumpkin fondue

Pumpkin fondue

Autumn is a time of year when the shops seem to be full of pumpkins – but sadly most are destined to make ‘pumpkin lanterns’ for Halloween rather than be eaten.  Well here is a really simple autumn alternative and would be perfect for any Halloween or perhaps Bonfire celebrations before the real onset of winter!

This is a really simple dish and will lend itself to lots of variation – We have used a standard British style cheese fondue mix of grated Cheddar and Emmental cheeses, together with some single cream and beer – though it would also work really well with a dry cider.  The other variation we used was adding chunks of Sourdough Bread to the cheese mix allowing it to absorb the cheesy flavours, and encourage those eating it to dig away at the cooked pumpkin at the same time as taking the cheese-bread mix.  The one word of warning I would give is to get a small pumpkin or you will spend forever filling it with cheese!

We used a small pumpkin weighing around 1.7Kg and cut round the top at around 45 degrees to make a replaceable lid that would not fall back into the pumpkin during the cooking!

The seeds and the loose stringy inside were first removed (don’t throw the seeds away as if you wash the stringy material off them they roast rather nicely).  The Sourdough bread was then torn into large chunks (ideally do not choose sliced sourdough if you are using a shop bought loaf) and add a layer to the bottom of the pumpkin.  To this add some of the grated Cheddar and Emmental mix.  Mix the single cream and the beer in a large jug and add a little grated nutmeg, a crushed and chopped garlic clove and some salt and pepper and mix well.  Pour some of this over the top of the cheese and bread and then repeat with further layers until the pumpkin is at least two thirds, but not completely full.  The Big Green Egg should be set up in indirect cooking mode with the platesetter in place and the feet upright.  We worked with a target temperature of around 130C and added a little cherry wood to give a gentle smokiness.  A small pumpkin should just fit in a MiniMax though you may need to be careful with its position because of the temperature probe.  Ours was a bit larger and needed our large BGE and we sat it in a shallow roasting tin to make sure it didn’t leak and could be brought easily to the table.   As the cooking progressed the pumpkin took on a delightful chestnut colour and shrank in size slightly (the reason not to fill completely).  It took around 90 mins for the pumpkin to soften enough to be able to spoon the flesh from the skin.  The vents were closed a little before this and the Pumpkin kept warm in the slowly cooling EGG until we were ready to eat.  Now as with most Fondue there is an element of “double dipping” that can occur when eating the fondue, especially as the bread was already incorporated.  If this concerns you and you are not just sharing with your ‘nearest and dearest’ then use a serving spoon to spoon out portions onto individual plates.

And what about the seeds?  Simply separate them from the stringy interior and wash them off.  Dry on some kitchen towel and lightly moisten with olive oil.  Sit in a ceramic dish on the EGG until toasty brown, allow to cool and salt lightly, great with a cold continental beer!

There are loads of potential variations – different cheeses, different alcohols, smoked sausage, lardon ………………

…………………………………………………….in fact the world is your …. pumpkin!

……………………………go on, give it a go!!


Cheese and sourdough bread Fondue in a pumpkin pot

October 19, 2018
: 2-4
: 30 min
: 2 hr
: V Easy

Cheese and sourdough bread Fondue in a cooked pumpkin pot

By:

Ingredients
  • Pumpkin 1.5kg
  • Single cream 200ml
  • Continental beer 250ml
  • Garlic clove crushed and chopped
  • 100g grated Emmental
  • 100g grated Cheddar
  • Thick slices stale sourdough bread ripped into chunks
Directions
  • Step 1 Cut round the top of the pumpkin at around 45 degrees to make a replaceable lid. Remove the seeds and the loose stringy inside (don’t throw the seeds away as they can be toasted later).
  • Step 2 Tear the Sourdough bread into large chunks and add a layer to the bottom of the pumpkin.  To this add some of the grated Cheddar and Emmental mix.  
  • Step 3 Mix the single cream and the beer in a large jug and add a little grated nutmeg, a crushed and chopped garlic clove and some salt and pepper and mix well.  Pour some of this over the top of the cheese and bread and then repeat with further layers until the pumpkin is at least two thirds, but not completely full.  Finish off with a layer of grated cheese and some extra grated nutmeg.  
  • Step 4 Set up the Big Green Egg for indirect cooking with the platesetter in place and the feet upright.  Add a little smoking wood and set the temperature to around 140C. Sit the Pumpkin in a shallow roasting tin and put on the BGE.
  • Step 5 After around 90 mins the pumpkin will have softened enough to be able to spoon the flesh from the skin.  
  • Step 6 Serve with a little more crusty bread and dig out the bread-cheese-pumpkin mix with a spoon and fork

Simple Coq au Vin – and a low calorie option too!

Simple Coq au Vin – and a low calorie option too!

The inspiration for this was taken directly from Tom Kerridge’s book on low calorie dining ‘Lose weight for good’ but slightly adapted for the Big Green Egg.  The recipe in Tom’s book describes (more…)

Cold Smoked Salmon – first of the Autumn 2019

Cold Smoked Salmon – first of the Autumn 2019

One of the real delights of the Big Green Egg is that it makes a really good ‘cold smoker’.  Clearly this was not the original intention but  (more…)

Osso-Bucco

Osso-Bucco

Osso bucco is a classic Italian dish which, as long as you don’t translate it into English (bones with holes), has lovely romantic overtones and memories of Italian holidays.  The dish is based on slow braised veal, but the bones, or more importantly the marrow from those bones, adds a delicious something else to this dish – whatever you do – make sure that the bones do go back to the kitchen ‘hollow’ with anything that still resides in their centres after cooking eaten and relished.  The dish can also (more…)